How to Archive Emails in Outlook 365 to Local Drive – Quick Solution

Are you looking for a direct and easy solution on “how to archive emails in Outlook 365 to local drive?” Then go through this write-up, and by the end of this blog, you will get a smart and productive solution for the same. Moreover, you will also get to know about manual methods.
5 Quick Steps to Archive Emails in Outlook 365 to Local Drive
- Step 1. Download, Install & Run Software.
- Step 2. Choose Workload & Apply Date Filter.
- Step 3. Login & Validate With Office 365 Credentials.
- Step 4. Set Destination Path & File Size from Drop-Down.
- Step 5. Select User Accounts & Click On Start.
But before diving into the step-by-step solution for it, let’s have a glance at the workings of the Office 365 in-place archive and how to enable it.
In-place archiving in Office 365 offers additional storage space to its users. To archive emails, the user needs to enable the “Archive Mailbox” from the Exchange admin center. Once it gets enabled, emails older than two years will automatically move to the archive mailbox.
- Reasons for Archiving Emails in Outlook 365 to Local Drive
- Follow These Steps to Enable Archive Mailbox in O365
- How User Can Archive Emails in Outlook 365 to Local Drive?
- Archive Emails in Outlook 2016 to Local Drive?
- How User Can Archive Emails in Outlook 2013 & 2010?
- Automated & Powerful Solution to Archive Emails in Outlook 365 to Local Drive
What are the Reasons for Archive Emails in Outlook 365 to Local Drive?
There are several reasons why users need to archive emails from Outlook 365 to local drive. Here are some of the note-worthy reasons to perform this action:
- Better storage management – Keeping your emails on a local drive helps free up storage space on your Office 365 mailboxes. As more and more messages accumulate in your email account, it can use up a significant amount of storage. By moving older or infrequently accessed emails to a local drive, users can keep mailbox sizes manageable and avoid reaching storage limits.
- Improved overall performance – Large email accounts with large volumes of messages can sometimes slow down Outlook 365 performance. Keeping email on a local drive can reduce the size of your mailbox and improve the overall performance of your email application.
- Compliance and legal requirements – Some organizations have legal or regulatory requirements to retain e-mail for a specific period. Keeping your emails locally helps you back up important messages and meet your compliance obligations.
- Manage offline access – Archive your emails to a local drive so you can access archived messages even when you’re not connected to the Internet. This is useful when traveling, working in areas with limited connectivity, or in situations where you need quick access to old emails.
- Long-term Storage Facility – Archiving emails to a local drive provides a way to store important messages for an extended period, even if they are no longer needed in the active mailbox. It can be especially valuable for preserving records, historical data, or communications that may be relevant in the future.
- Backup and disaster recovery – Keeping a local copy of your Outlook 365 email creates an extra layer of backup and further, it prevents data loss. You can easily restore the archived email from a local drive if your mailbox account experiences any problems or in the event of server failure.
It is evident from the above reasons that arching Outlook 365 emails to local files, requires careful organization and management to ensure that you can find and retrieve specific messages when needed.
Follow These Steps to Enable Archive Mailbox in O365
Step 1. Browse https://login.microsoftonline.com/ and sign in with your Office 365 account.
Step 2. Now, in the “Security & Compliance Center” you need to select “Data Governance” and from the given options select “Archive”.

Step 3. An Archive page will be opened on the screen. Users can see all the associated mailboxes with their Office 365 account. Now at the right below, the corner of the page has the option to enable or disable the archive mailbox.
Step 4. Now, users can enable the “Archive Mailbox” of the desired primary mailbox.
Step 5. Now, a warning dialogue box will be opened for confirmation of the same. The user needs to click on the Yes button to enable the archive mailbox.
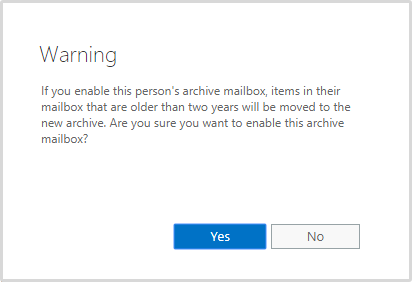
Now, this process will take a few seconds to create the “Archive Mailbox”.
How User Can Archive Emails in Outlook 365 to Local Drive?
Once the archive mailbox is enabled, then users can archive their emails by following the given steps below.
Step 1. Browse outlook.live.com and log in using Office 365 account credentials.
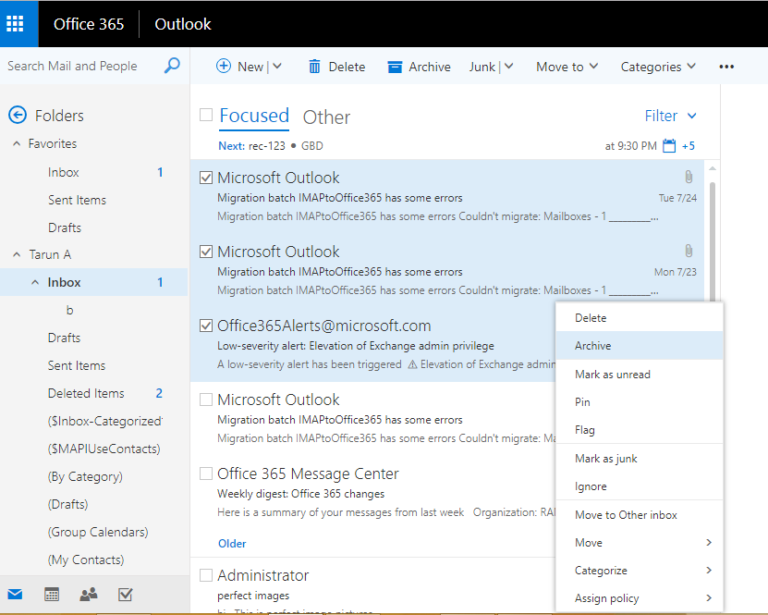
Step 2. Now select all the emails you want to archive and then, click on the “Archive” icon provided at the top of the screen.

Step 3. You can also do it in another way, after selecting the desired emails, right-click on them and a dialogue box will open and select archive.
Also Read: How to Import Contacts in Outlook 2007 from VCF File?
How User Can Archive Emails in Outlook 2016 to Local Drive?
Step 1. Open the Outlook desktop application and select desired emails from the inbox or any other folder
Step 2. Now to answer the user query, i.e. how to archive emails in Outlook 365 to local drive, right-click on the selected emails and select archive from the dialogue box.
How User Can Archive Emails in Outlook 2013 & 2010?
The process of Archiving in Outlook 2013 & 2010 is similar.
Step 1. Open the Outlook app and to archive emails go to the “File” tab
Step 2. Now click on “Cleanup Tools” and then click on the archive from the drop-down options.
Step 3. A new window will open on the screen displaying all the folders of Outlook. Now select the desired folder you want to move to the archive mailbox. Now you need to browse to the location where you want to save this file.
Automated & Powerful Solution to Archive Emails in Outlook 365 to Local Drive
It is evident from above that the manual method is different for different versions of Outlook. Sometimes it can be confusing for the users to execute with a manual method. Additionally, it can result in crucial data loss, in case the wrong method gets applied in the wrong version of Outlook.
Hence, if you are looking for a more flexible and automated solution for this operation. The Office 365 Export tool is the best match for it. The utility is specially designed in this way to securely archive all Outlook data into a secure file format.
Step By Step Way to Archive Emails in Outlook 365 to Local Drive
Step 1. Use the above button to download the software on your Windows computer. Choose Office 365 as the source and Outlook as the destination. Click on the Next Button.

Step 2. Enable all the mailbox categories that you want to archive from the workload selection area. Apply date filter if you required a select data archival.

Step 3. Login with Office 365 admin credentials and click on the validate button. Then click on Next.

Step 4. Set the destination path and location where you want to archive the resultant file.

Step 5. Add user accounts using any of these three options – Fetch Users, Import Users, or Download Template.
 Step 6. Select the required user accounts to archive and click on the start button.

Also Read: Know Complete Solution of Export Office 365 Calendar to PST Format
What are the Benefits of Archive Emails in Outlook 365 to Local Drive?
- Free up space – Archiving emails to a local drive can help free up space in your Outlook 365 account and improve its performance.
- Improved data backup – Archiving your emails to a local drive provides an additional backup of your important data, in case you face data loss or damage.
- Better organization – Archiving emails to a local drive allows you to categorize and store your emails in a more organized manner, making it easier to find specific emails when you need them.
- Faster search – Archiving emails to a local drive can improve the speed of searches for specific emails, as the data is stored on a separate, locally accessible drive.
- Enhanced privacy and security – Archiving emails to a local drive can provide additional privacy and security for your data, as the data is stored on a device under your control and protected by your security measures.
Related: Easily Migrate Office 365 to Google Suite? Get All Your Answers Here
All Things Considered
Though manual archiving is available, however, users need to archive differently for different versions of Outlook. Instead of an indirect manual method, using a smart and fully automated tool can speed up the whole process, making it more reliable for users.
Hence, this utility makes it more flexible and easier for users with queries like – how to archive emails in Outlook 365 to local drive, it creates a secure file of all archived emails and folders on the local drive. Moreover, by using the above-mentioned tool, users can archive their emails and folders in Outlook and can keep them in their local drive.