How to Use Drive Shipping Method to Import Organization’s PST Files to Office 365?
Many times organizations find multiple issues while managing PST files, it could be corruption, backup protection, complexity in the administration of eDiscovery or any other reason. Hence, they decide to import PST to Office 365 mailbox. Therefore, in this write-up, we illustrate the complete step by step process on how to use drive shipping to import organization’s PST files to Office 365. But, before moving towards the solution let’s know about Office 365 drive shipping more clearly.
Quick Glance At Office 365 Drive Shipping Technique
Basically, drive shipping is the simple method to import or upload unencrypted PST files to user mailboxes. With this approach, users can copy Outlook PST files to a hard drive and then physically ship the drive to Microsoft. When the hard drive is received by MS, then the PST files are moved to Office 365. Read to know how to use drive shipping to import organization’s PST files to Office 365
Benefits of Using Drive Shipping to Import PST Files to Office 365
It is an effective way to import PST files to O365 by drive shipping because with this technique we can import large amounts of archival mailbox data to Office 365. After uploading archival data to the mailboxes we can perform these tasks:
- Enable archive mailboxes so that users can have additional mailbox data storage space
- Place mailboxes on hold to preserve the data.
- Search the data by using Microsoft eDiscovery tools
- Apply retention policies to control how long the data is retained.
- Protects organization data against data loss.
Prerequisites Before Moving Outlook PST to Office 365 via Drive Shipping
Following are the prerequisites that need to be followed to import organization’s PST files to Office 365:
- The hard drive in which PST files has to be copied must be encrypted with BitLocker
- Organizations must-have FedEx or DHL account.
a) The organization in east & south-east Asia must have DHL account.
b) The organization’s in the US and Europe should have FedEx account. - Retention period should be set to an infinite period
- Mailbox Import Export role should be assigned to the user to import Outlook PST files on hard drive.
Must Read: How to Import PST Files into Office 365 Webmail
How to Use Drive Shipping to Import Organization’s PST Files to Office 365
Users should follow these steps to upload Outlook PST to Office 365 without Outlook:
Step 1: Download Import Tool
-
- Firstly, go to https://protection.office.com & download import tool and secure storage key
- Then, log in to Office 365 by using admin account credentials
- Select Data Management Option from the left pane & click on Import
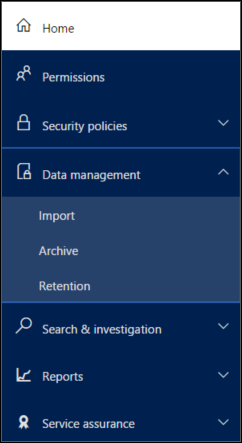
- From the Import Page click the Import option to move PST files to Office 365
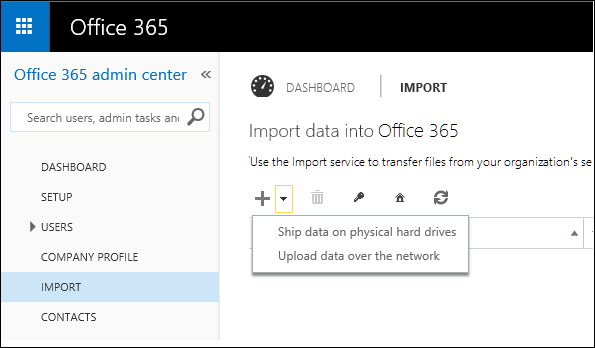
- Now, from the new screen click the ‘+’ icon & choose ‘Ship data on physical hard drives’
- From the New Job page user have to click the ‘Download Tool’ option and install the WAImportExport.exe tool
- Copy secure storage key by moving back to ‘Ship Files’ page
- Now copy the ‘displayed key’ and store it in the file
- Finally close the page by clicking the Cancel button
Step 2: Copy PST File to Hard Drive
- On the local machine open the cmd and go to the directory where the WAImportExport.exe utility is installed
- Then, run the below command to migrate PST files to hard drive

- /j: – Name of journal file containing the information about the drive being sent to Microsoft center.
- /t: – the drive letter of the hard drive connected to local machine
- /id: – specifies the name of copy session to move PST to Office 365.
- /srcdir: – source directory path where the .pst files are saved.
- /dstdir: – destination directory path where the PST file will be uploaded.
- /sk: – secure storage key
- /logdir: – log file location
- /encrypt: – the BitLocker encryption key
- Each time user has to run the below command when it is needed to run WAImportExport.exe tool to migrate same Outlook PST files to same hard drive.
Step 4: Create PST Import Mapping/CSV File
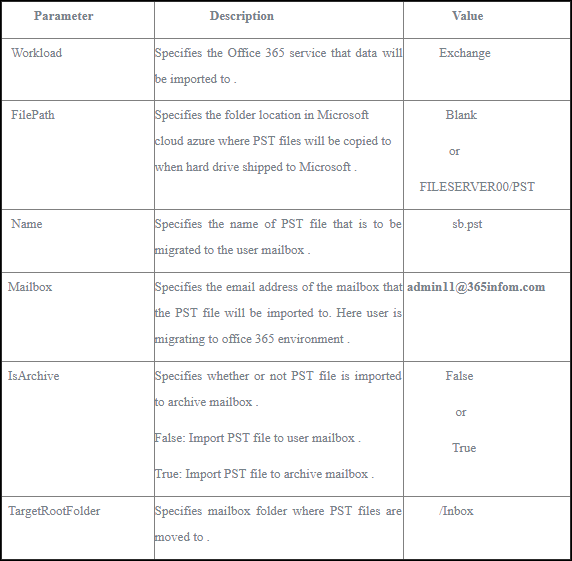
Microsoft data center copy PST file from hard drive to Azure data storage area. The import service will utilize the information present in the mapping file / CSV file to know which user mailbox PST file has to be imported.
- Firstly, download the CSV file.
- Then open CSV on the local system
- The CSV file will have parameters as follows:
Step 5: Create PST Import Job
- Navigate back towards Office 365 Admin Centre Import page
- Choose Import Services >> New Job + >> Ship Data on Physical Hard Drives
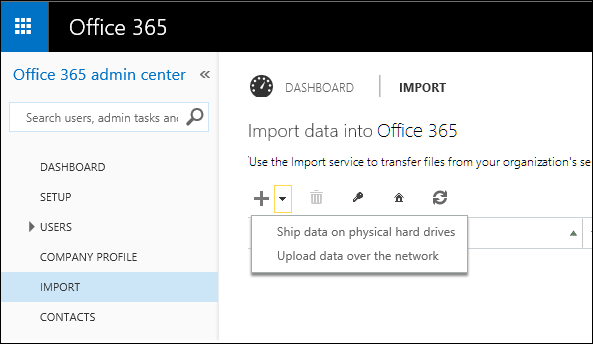
- Now, from the ‘New Job’ page, the user has to mark the boxes for ‘hard drives are prepared’ and ‘I have access to mapping file’. After that, click the Next button
- Now, user have to type in the name for the PST Import job
- Click on the ‘Add+’ option and go to the location of WAImportExport.exe tool
- Upload the journal file & hit the Next button to import organization’s PST files to Office 365
- Click ‘Add’ option and choose the CSV file created in the previous step
Hit the Next button - Type in the Contact information page & click the Finish button
Step 6: Ship the Hard Drive
Lastly, users have to ship the hard drive to MS headquarters. Users need to make the note of tracking number & shipping label. Drive shipping to import organization’s PST files to Office 365 is majorly used by the organization who don’t have enough resources or time.
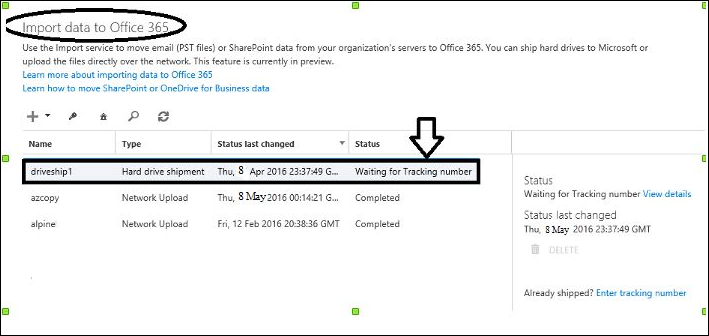
Why to Say No to Office 365 Drive Shipping Method
- Cost of drive shipping PST to Office 365 is $2 USD per GB of data.
- Import process could take days or months for completion due to shipping time.
- Large storage hard drive is needed
- High technical knowledge is required to use drive shipping method to move PST Files to Office 365
Also Read: How to Export Office 365 Calendars to PST File Format?
Alternative Method of Drive Shipping Method
If you don’t wish to trouble yourself with the complex and time taking method of Drive Shipping, then you can take help of automated tool. The best software for such purpose is Office 365 Import tool. During the import process, the tool provides various exceptional features for quick and easy import process.
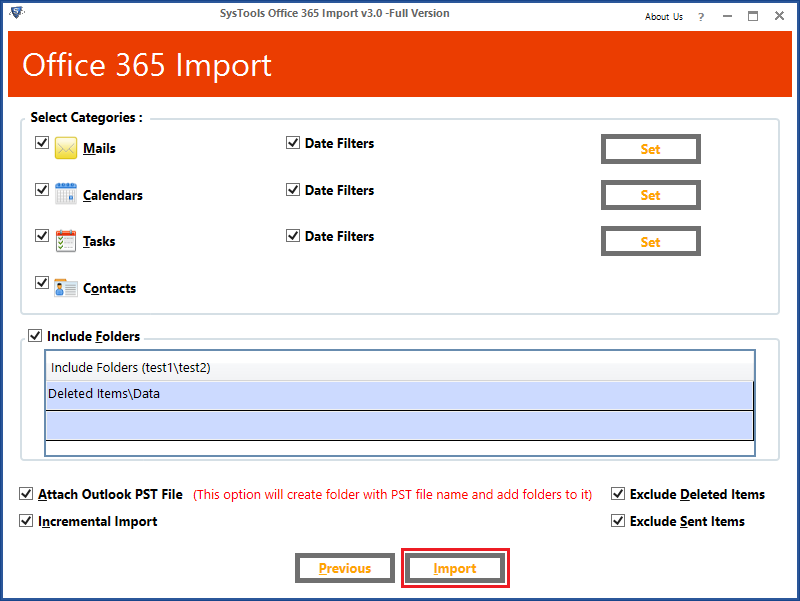
It is a very simple solution that can easily migrate multiple PST to Office 365 user or Admin account. Along with this, it provides Date Filter option to import selective PST data to O365. One of the most advantageous features offers by this utility is that it perform the incremental import i.e. with this feature, users can prevent the migration of already imported data.
Quick Steps to Import PST file Without Drive Shipping
- Login into the tool using Office 365 account credentials.
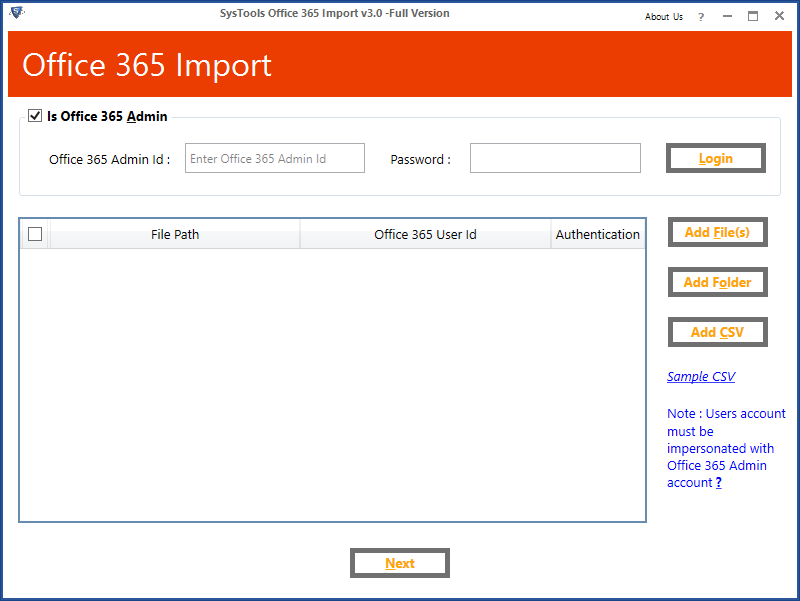
- Import PST file using Add File(s) or Folder option.
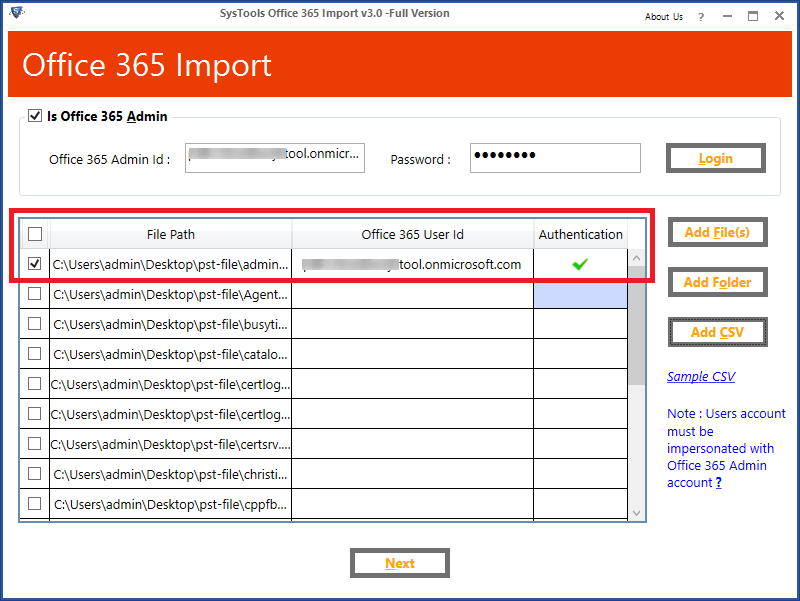
- Manually map PST file to user account or use Add CSV option.
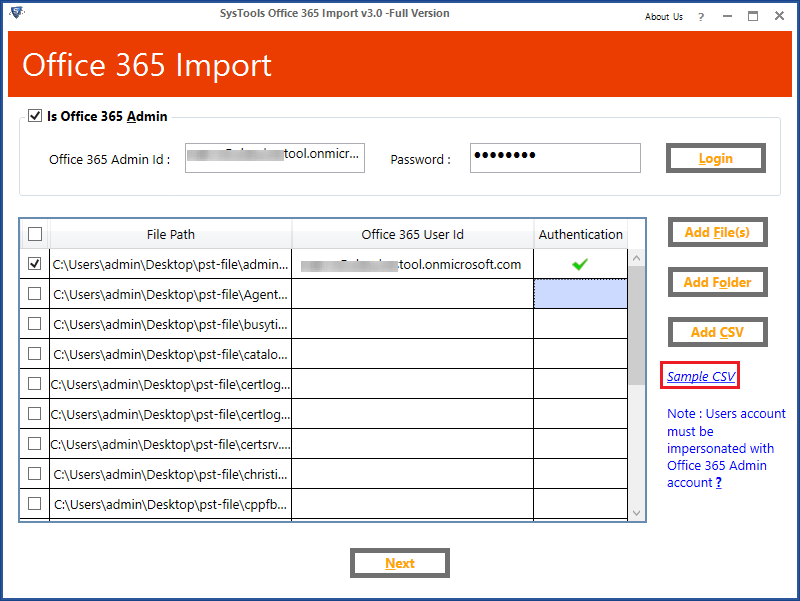
- Click Next and Select the Category of data need to be imported.
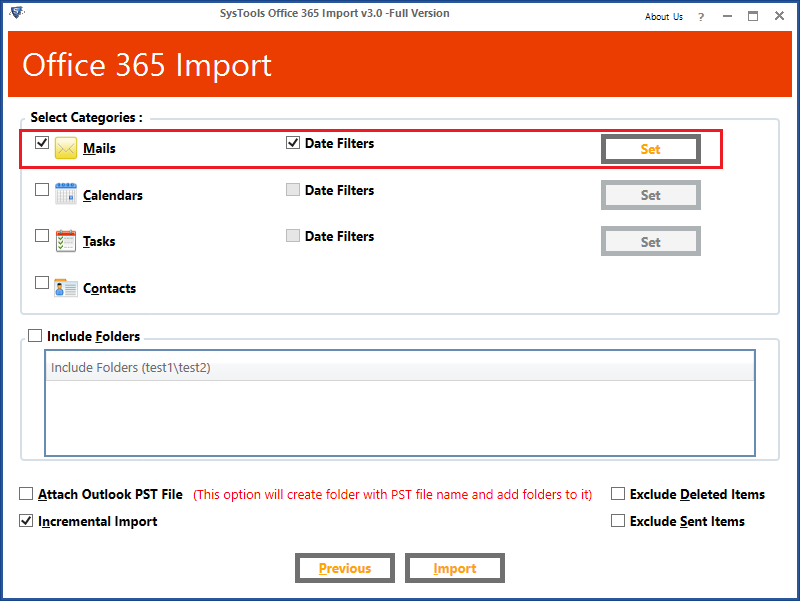
- Apply filters and click on Import button to Start process.
Time to Sum Up
One of the most common queries asked by many organizations is how to batch import PST email to Office 365. Therefore, for the resolution of this query, they can use drive shipping to import organization’s PST files to Office 365. But, this approach involves lengthy and complex steps. Therefore, to overcome the limitations of the manual procedure it is recommended use Office 365 import tool. You can try the free demo version of tool, which allows to import 25 items per folder from PST file.

