PowerShell Command to Export Mailbox to PST Exchange 2016/2013/2010

Summary: This write-up will guide users to use the PowerShell command to export mailbox to PST Exchange 2016, 2013, 2010 by using Exchange Management Shell. The “New-MailboxExportRequest” cmdlet helps users to export the Microsoft Exchange database mailbox to the Outlook data file. Also, the professional method helps users to save multiple Exchange mailboxes to PST in bulk in a secure way.
There are certain scenarios such as corruption, space size issues in Exchange Server, hardware failure, deletion of Exchange mailboxes, etc. These cases make the users export Exchange mailbox to PST to safeguard the data. If any such scenario occurs, the users can use the exported PST file in the future.
Before using the Exchange PowerShell command, there are certain things that users need to do:
1. By default, the Microsoft Exchange Server doesn’t export Exchange mailboxes. One needs to provide Exchange “Mailbox Import Export” role that gives permission to export data from the mailbox. Follow the command given below to assign a role:
New-ManagementRoleAssignment –Role “Mailbox Import Export” –User “USER NAME”
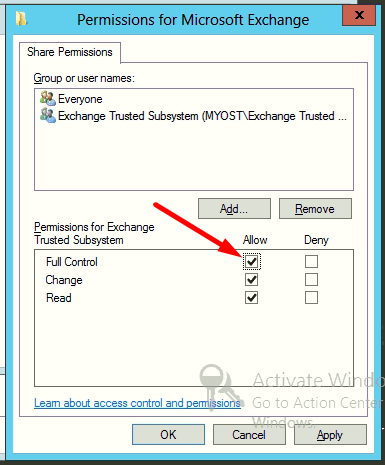
2. Create the shared folder that stores the exported Exchange data and provide full permission to the Exchange Trusted Subsystem security group.
Use PowerShell Command to Export Mailbox to PST Exchange 2016 / 2013 / 2010
There are different Exchange mailboxes such as user, archive shared which contain important data. To export all these mailboxes follow the command given below:
PowerShell Cmdlet to Export Exchange User Mailbox to PST
New-MailboxExportRequest -Mailbox “enter mailbox name” -FilePath “\\ServerName\FolderName\nameoffile.pst”
Example:

PowerShell Command to Export Archive Mailbox
New-MailboxExportRequest -Mailbox “archive mailbox name” -FilePath “\\ServerName01\FolderName\nameoffile.pst” -IsArchive
Example:

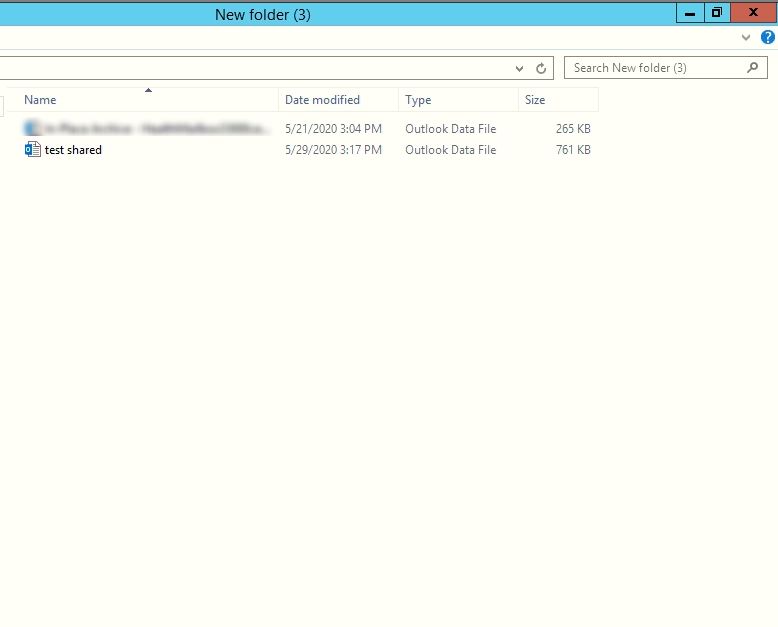
Resultant File:

PowerShell Command to Export Shared Mailbox into PST
New-MailboxExportRequest -Mailbox “name of shared mailbox” -FilePath “\\ServerName02\Folder\nameoffile.pst”
Example:

Output File:
Automated Solution to Export Mailbox to PST from Exchange 2016, 2013 or 2010
Users can use Exchange Export Tool that can help users to export complete Exchange mailbox data without using any PowerShell commands. This makes the entire job quick and error-free for users who are not used to scripts and all.
One of the major features of the software is that it auto-detects the Active Directory configuration and loads it into it. Additionally, users can Include Sub-Domain users to export them into PST format. It is an optional feature so you can enable / disable it as per your need. There is a date-based filter as well that makes it easier for the users to export only selective data from Exchange into PST format.
On the other hand, this utility requires Microsoft Outlook to be installed on your system while the application is running. Outlook version can be 2019, 2016, 2013, or earlier version to export mailbox to PST Exchange.
Note: Exchange PowerShell command only exports a single mailbox at a time, and it doesn’t export offline / dismounted EDB files. One can use the professional EDB to PST Converter given below to transfer unmounted Exchange database files, mailboxes, and items to Outlook data files in batch from various mailboxes. There are various advanced features as well that you can try after downloading the tool for free on Windows OS.
Steps to Export Mailbox to PST Exchange 2010, 2013, 2016 from Live Server
1: Download the automated wizard in your local system and launch it.
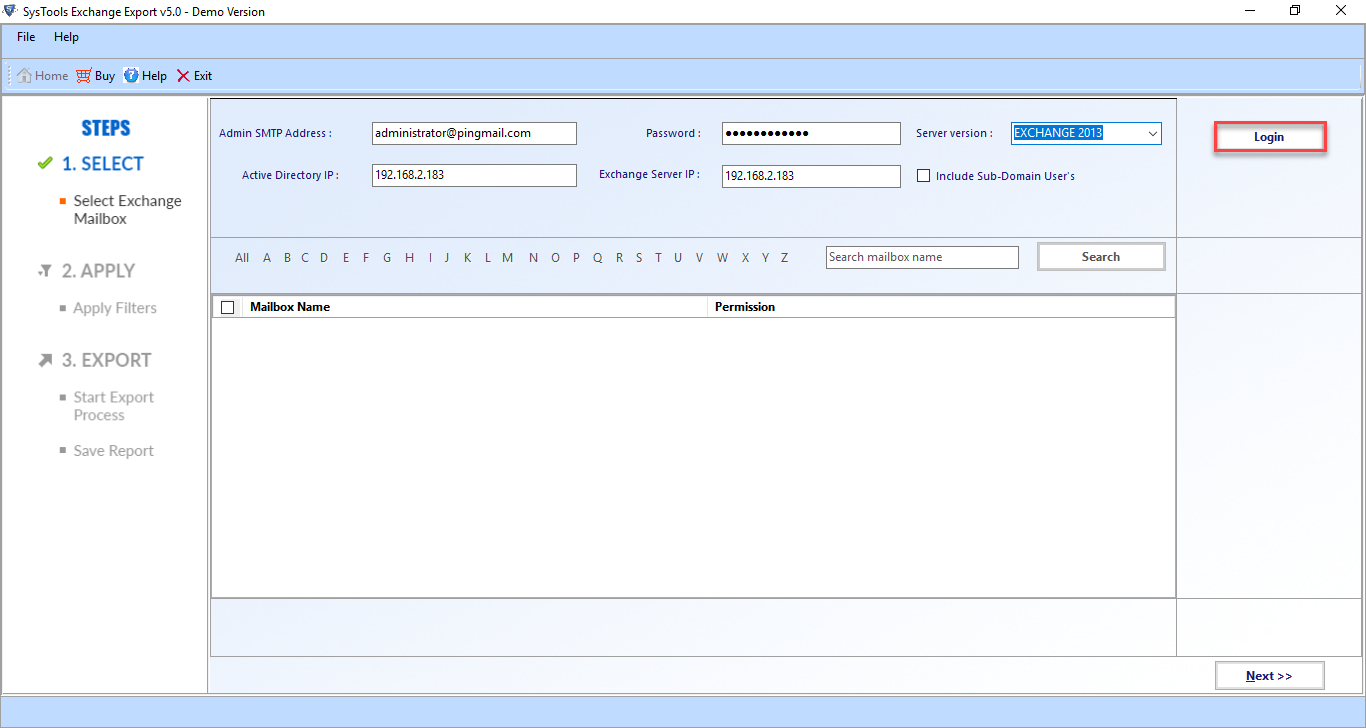
2: Then you will get a list of Exchange mailboxes along with the permissions assigned to them.
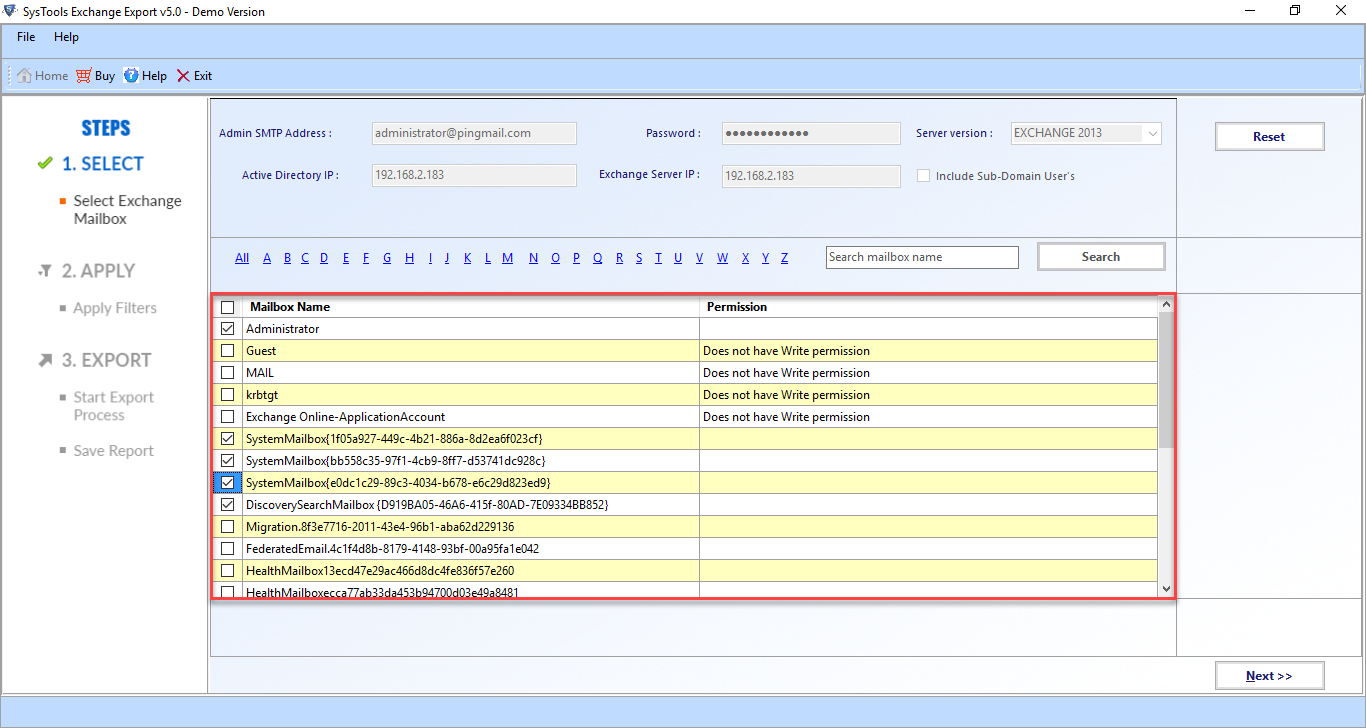
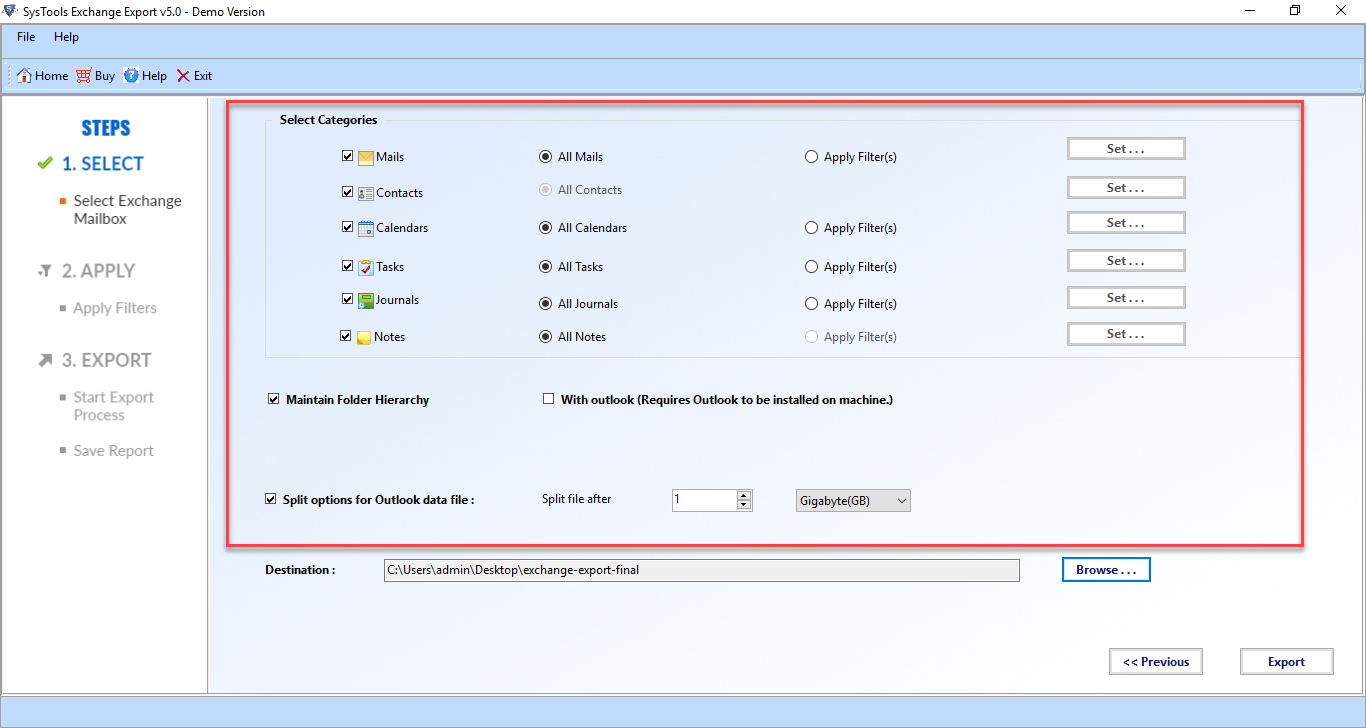
3: Select Categories that you want to export and apply filters if required.
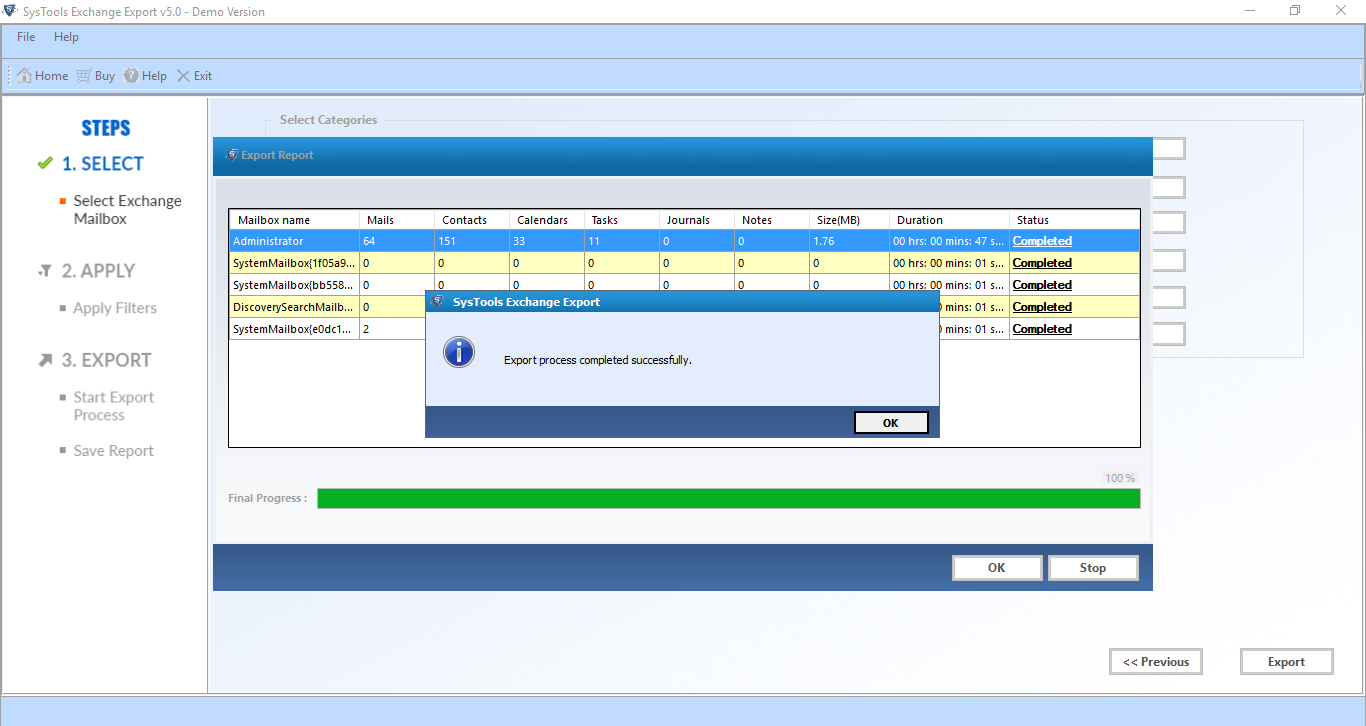
4: You will get a completion message once you successfully export mailbox to PST Exchange.
Questions that Most of the Users Ask
Q. What is the step-by-step guide to export mailbox to PST in Exchange 2016?
A. There are 5 easy steps to execute the export process:
- Free download software to export Exchange mailbox to PST
- Login via Exchange credentials and select mailboxes for export
- Choose the Categories and enable Date filters if needed
- Select the Destination path where you want to save your data
- Once you implement all settings, hit the Export button
Q. Will this software work with both Live Exchange Server and Dismounted Exchange DB files?
A. No, the aforementioned utility will export data from the Live Exchange Server only. The software supports Exchange 2016, 2013, 2010, and lower versions.
Q. Do we need to apply admin rights to mailboxes to carry out the export process?
A. Yes, you have to assign full admin rights to the Exchange mailboxes that you want to export. Else, the software won’t be able to export mailbox to PST in Exchange.
Q. Does this software also export the public folder data as well from Exchange mailboxes?
A. No, this particular application does not support exporting public folders into PST format. However, you can use our secure Exchange EDB Recovery Tool to export public folder data.
Author Suggestion
This write-up provides detailed information to use PowerShell command to export mailbox to PST Exchange 2016, 2013, 2010 by using Exchange Management Shell. The New-ExportMailboxRequest helps users to export exchange mailbox but this cmdlet exports only one mailbox at a time. Moreover, it requires technical expertise to run it without any error. So, an automated tool is discussed to overcome all these limitations and get the job done.