Public Folder Migration to Office 365 with Tried & Tested Steps

Being a reliable solution provider in the industry for many years now, many users ask how the quick and simple steps to migrate public folders to Office 365. Understanding the importance of these public folders in an organization, we have discussed two solutions to migrate the data without losing any data. The users can choose any of the solutions as per their requirements.
If we talk about going with the manual solution, then that method contains a lot of steps and demands technical expertise as well. If you don’t have proper knowledge about how things work in Microsoft Exchange, then it could be a complicated task for you. Thus, in that case, many tech experts suggested going with an automated solution discussed in the following section.
Free Procedure to Migrate Public Folders to Office 365
Most of the users look for the free manual process to export their data to the destination platform. As it is a free procedure, it has some pre-requisites and complexities that you must take into account before initiating the process.
Pre-Requisites for Migration
1. In Exchange Server, you should be a member of the Organization Management or Server Management RBAC role groups.
2. In the Exchange Online, you should be a member of the Organization Management role group.
3. If the public folder is larger than 25 GB, then divide that public folder into multiple small public folders or you can delete content from that folder.
Note: 25 GB limit only applies to the public folder, not to any child or sub-folders.
Step by Step Guide for Public Folders Migration to Office 365
1. Firstly, download Exchange 2013 / 2016 Public Folders migration scripts and save these scripts on the local system and run the PowerShell commands.
2. Now, prepare for the public folder migration, but before that make sure that there are no duplicate public folder objects, no orphaned Public Folder mail objects and confirm that SMTP email address configured for public folders in the AD should be matched to the SMTP email address on the Exchange objects.
3. Now, generate the CSV files.
4. Create the public folder mailboxes on the Exchange folder Online.
5. Begin the migration request.
6. Generating the request for the downtime.
7. For the final migration lock down the public folders in the Exchange 2013 environment.
8. Finalize the Exchange public folder migration.
9. Unlock public folder in Exchange Online.
10. Finalize the migration on-premises.
11. Lastly, remove Exchange public folder from the Exchange on-premises environment.
To know complete step by step process, visit the link:
Professional Solution to Migrate Public Folders to Office 365
With Exchange EDB Recovery Tool, users can easily perform the batch migration of public folders to Office 365. The software provides the functionality to transfer private as well as public folders of Exchange Server.
Additionally, there is an advance recovery mode offered in this tool that helps you repair any kind of corruption issues in public folder EDB file. There are two scan modes i.e. Quick Scan and Advance Scan. You can choose any of the options depending on the corruption level of the file.
The software supports various Exchange database mailboxes such as: disconnected, user, archive, shared, legacy and items like – mails, notes, tasks, journals, calendars, contacts. User can export this Exchange data selectively as well as in batch to the Live Exchange Server, O365, and EML, HTML PST, MSG, PDF, MBOX file format.
You don’t have to use PowerShell command to export mailbox to PST Exchange 2016, 2013, and below versions. Any technical and non-technical users can use this professional software without having any prior technical skill & knowledge.
It automatically creates the export report which allows users to check success and fail count of export Exchange data to the selected export option.
Step by Step Process for Migration
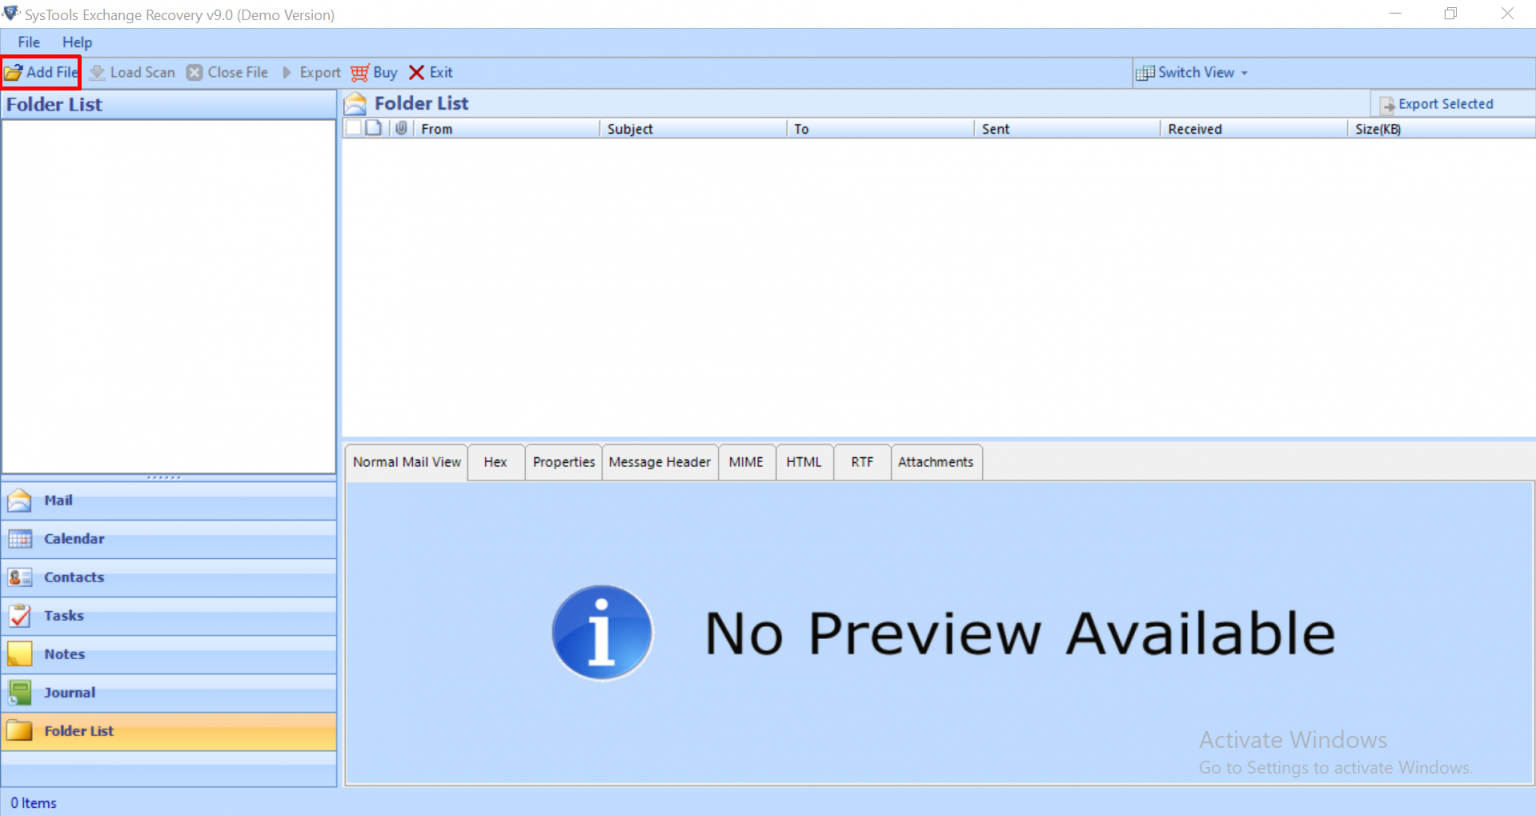
1. Download the software and click on Add File option, then browse (Pub1.edb).
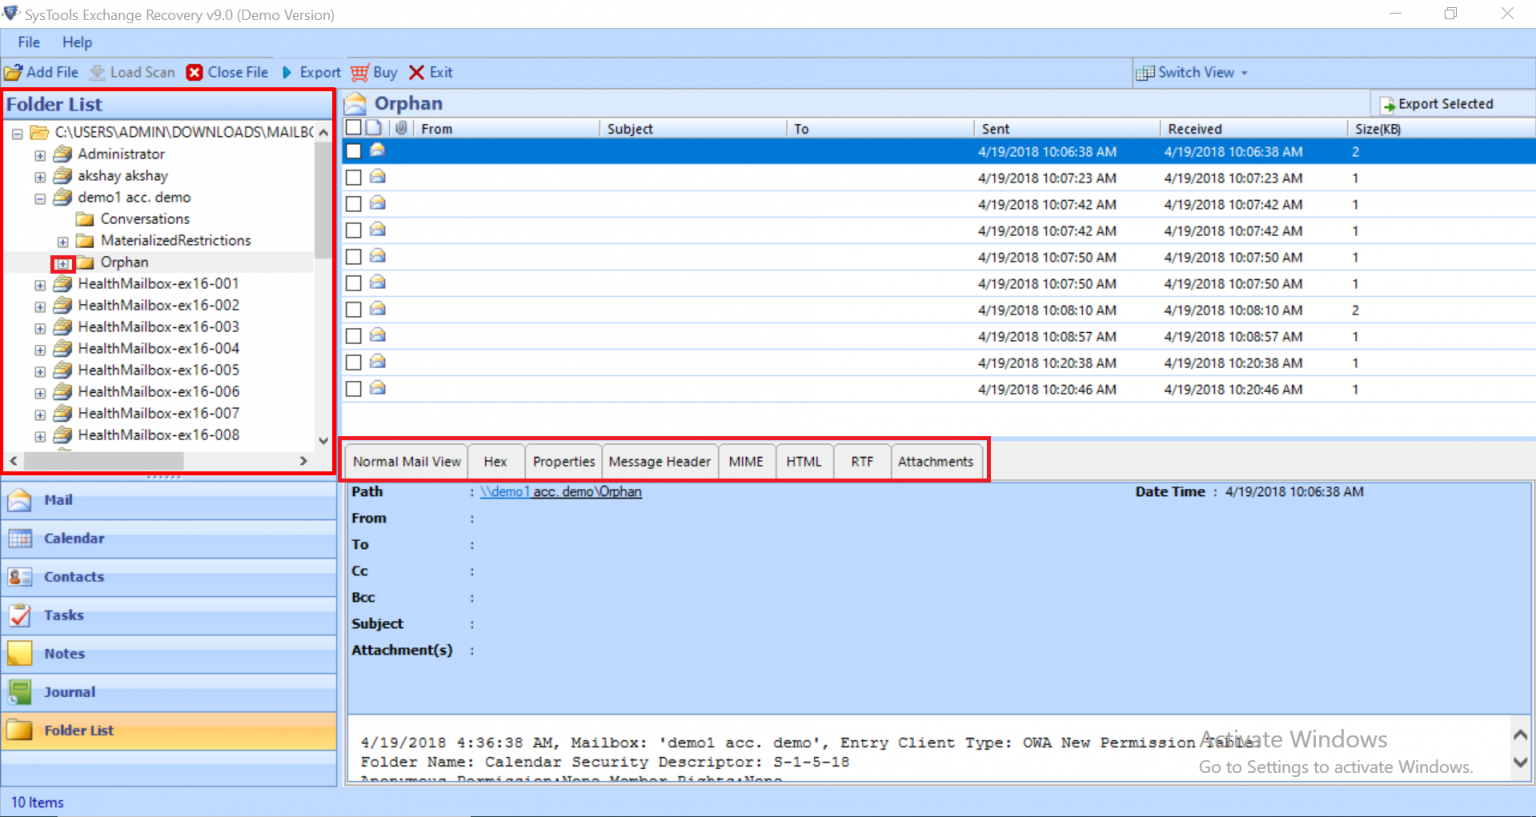
2. Select scan mode & click on + icon to expand the mailbox items and click on the specific public folder to view its emails.
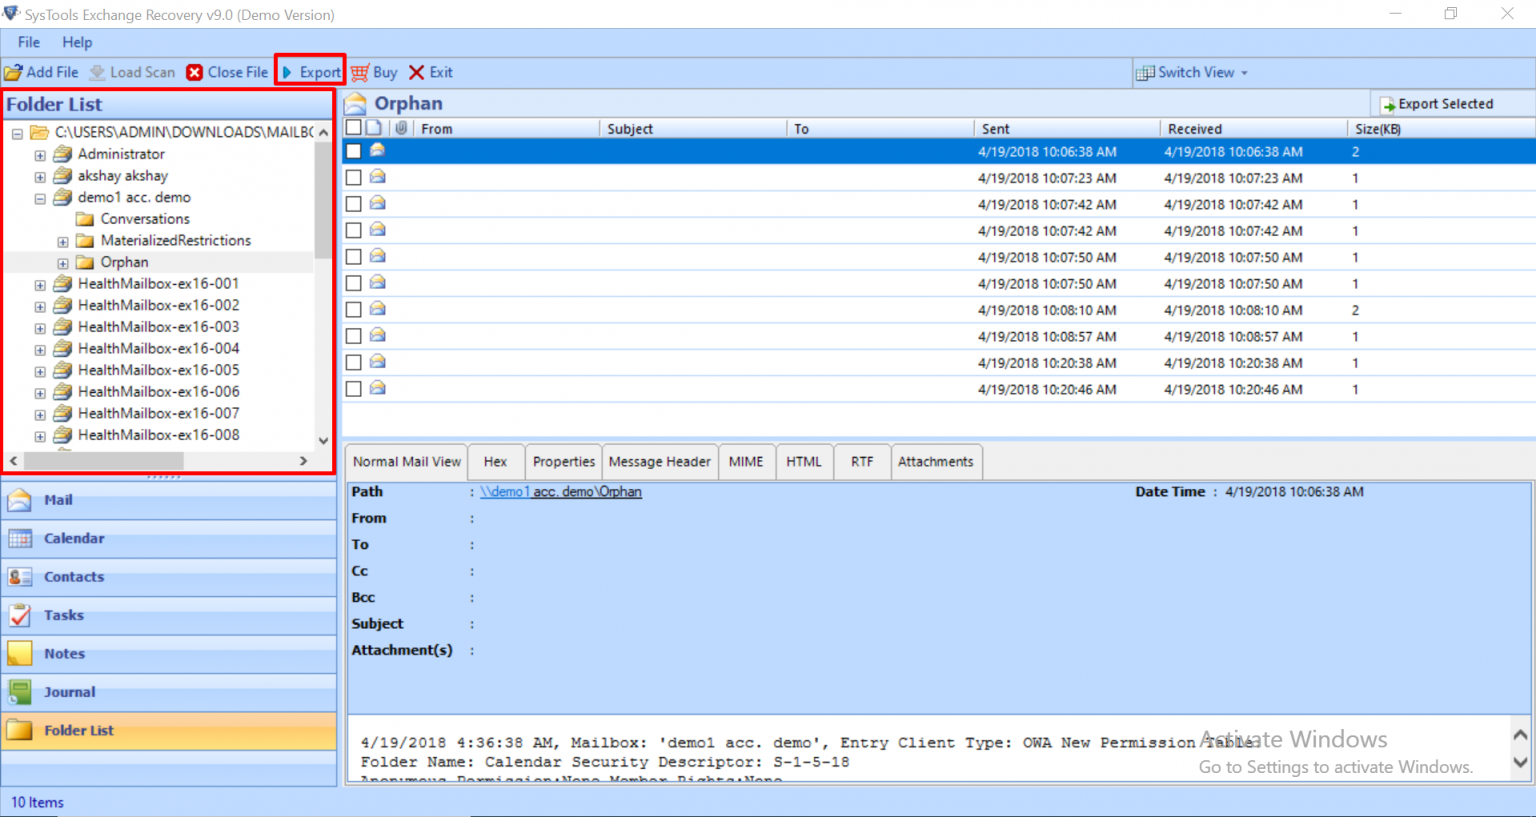
3. Click on the Export button to move public folders to Office 365.
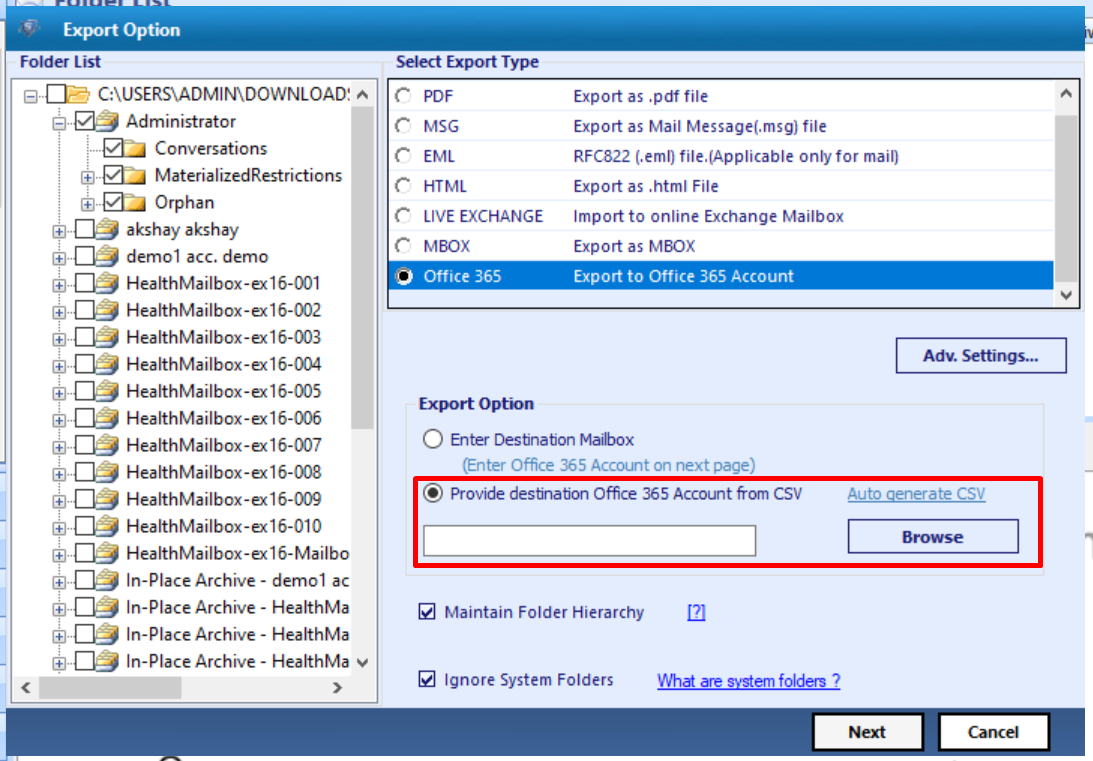
4. Then, click on Office 365 & configure “Office 365” settings. Click on Advanced Settings.
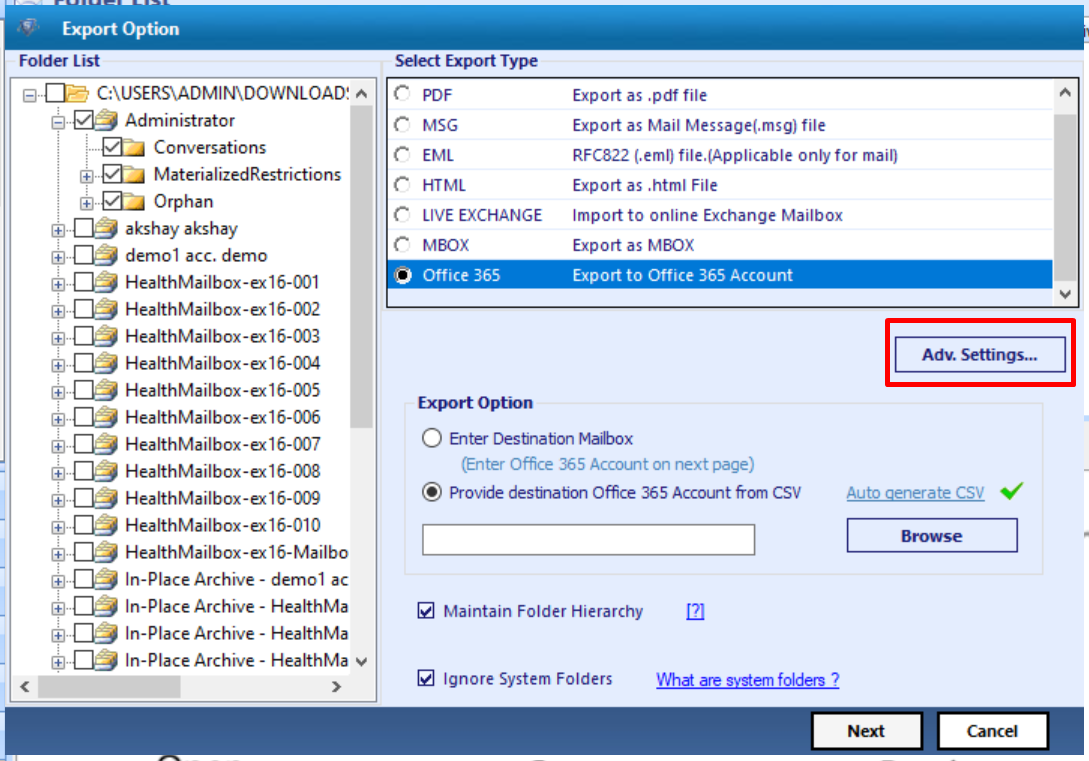
5. After that, execute User Impersonation:
- Admin SMTP: Enter the Admin username for the admin account.
- Password: Enter the password for the admin account.

6. Now, there are two ways for public folder migration to Office 365. You can either provide a destination mailbox or provide a CSV file containing Office 365 account and click on the Next button.
7. Enter the valid Exchange mailbox name & let the software validate it.
8. Once the validation is completed, click on Export button to initiate the process.

Conclusion
Here, in this write-up, we have seen two different solutions i.e., manual & professional to migrate public folders to Office 365. The manual approach of public folders migration to Office 365 is quite complex & time-consuming. Therefore, to overcome the limitations of manual method, we have explained a tried and tested professional solution by experts.