Export Public Folder to PST – Explains Tried & Tested Methods

Users might want to export public folder to PST as the Public folder is a folder wherein a user can store important info to share with fellow users.
All the Exchange Server users know that the EDB files store Public & Private folders both of which contain information.
You can easily, quickly, & more efficiently share the information with the members than manually. It is possible to share Public Folders with Outlook structure making it easier to share information.
Users are always suggested to keep a copy of their data to keep them safe & secure. If you export Exchange public folder to PST, the data will be safe from corruption, virus attacks, & other threats.
In case anything happens with your original folder database, the user can make use of the backup files to retrieve the data.
Note: The public folder can be turned into a mail-enabled folder by the admin and made a member of distribution groups. If that is done, then, any incoming mail of the distribution group will also be received in the public folder.
Hence, it is important to keep all the data safe. But how?
Is There a Free Way to Export Public Folder to PST?
Yes, there is a free manual technique to export the folders. MS Outlook has a built-in wizard i.e. Import/Export Wizard which can import and export Outlook data files.
Let’s take a look at the steps:
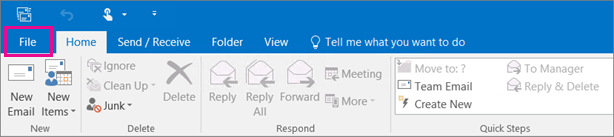
1. Open your MS Outlook application on the desktop. Click on the File tab.
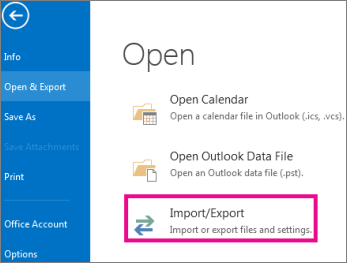
2. Choose Open & Export from the menu and hit the Import/Export option.
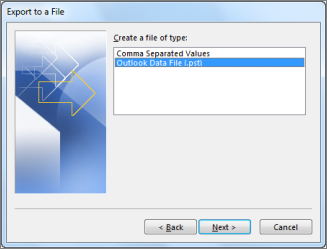
3. Click on the Export to a file option from the window & hit Next.

4. Then, select the Outlook data file (.pst) option and press the Next button.
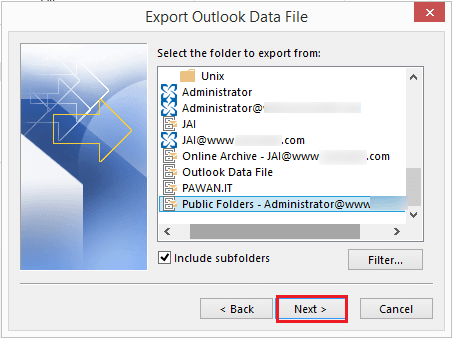
5. Now, to export Exchange public folder to PST, choose the Public Folder from the list of folders. Hit the Next button.
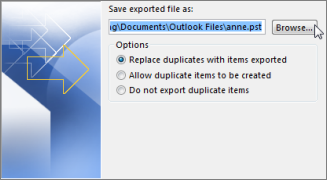
6. Browse for the destination path of end files and deal with the Duplicate Items. Tap on Finish.
After that, navigate to the location of the files.
There are a few errors with this method which can cause certain troubles while exporting the data.
Drawbacks of Using Manual & Free Method for Exporting Folders
- The process takes a lot of time to complete depending upon the size of the files.
- It can cause errors during the process to export public folder to PST due to large files leading to corruption.
- Various errors caused due to large sizes or bulk transfer can also lead to data-loss situations.
- No guarantee of the folder structure or data integrity maintenance.
- The process can only export data from one account at a time.
- If you have multiple accounts’ data to transfer, it becomes difficult as you will have to perform the same procedure again and again.
All these limitations make the manual & free method a little difficult to perform. This leaves users in a confusion and makes them second-guess this procedure.
Need a simpler way? Read below.
Export Exchange Public Folder to PST by Applying a Simpler Solution
The majorly and widely known technique amongst the experts is the Exchange EDB to PST Converter Tool. Experts have tried & tested this tool and claimed that the software allows exporting data and create a UNICODE type of file as well.
It provides the option to export data from Private Exchange mailboxes as well along with the Public folders.
The software keeps the data that you export in Outlook data file format (PST) safe at all times.
Take a quick look at the steps of the software to export your desired data.
Following the Steps of the Software to Export Public Folder to PST
1. Install & run the tool. Click on the Add File option at the top-left side of the window.

2. Mark the Select File radio button from the window. Choose the file you want to insert and click apply the Quick or Advance Scan as per requirement.

3. Preview the inserted data file and click on the Export button to transfer all the data.

4. Choose the Export Type as PST and select the Advance Settings option to apply the filters.

5. Set the dates in the Date-filter to selectively export Exchange Public folder to PST. Mark the Split PST option & select a specific size for all data files.

6. Click on the Browse button to navigate to the destination location. Hit the Export button to start the transfer.

Once you export the data files, you can easily open or import these files in your Outlook account. After that, you will be able to see the messages with the exact same hierarchy as in the public folder.
Advantages of Using the Software for Exporting Folders
The benefits of using the tool to export public folder to PST are:
- Allows to preview Exchange mailbox items before exporting them
- No changes are made to the metadata or the folder structure
- Ability to export data in bulk from all the categories like Emails, Contacts, Calendars, etc.
- Selective data transfer via Date-filter and category-filter
- Create a single UNICODE type of file to store the data
- Works with all Windows OS versions, MS Outlook, & Exchange Server
Ending Lines
Various users look for certain solutions that can help them export public folder to PST without making any changes to their data files. The manual method to perform the same process creates a lot of errors & leads to corruption errors.
The software to export the data files is simple to use and provides various features to the users. You can learn the procedure to remove corruption from the files you want to transfer if the need be. The choice is yours if you want to go for the free method or the professional method.