How Can I Partition My Hard Drive without Formatting Windows 10?
Summary: This blog deal with the comprehensive solution to partition hard drive without being formatted Windows 10. The following method is applicable to not only Windows 10 but also to Windows 8.1, 8, 7 & other below versions.
Yes, you can. The above query is quoted from a reliable and popular technical forum. This scenario can arise with anyone. But Do Not Worry, here in this blog, we are going to tell you each and every possible way to partition hard drive without formatting your Windows 10. Let’s finally go with the method to do the partition.
Note: During the entire process, there are chances that your data get corrupted or deleted (soft or permanently) due to many reasons. Use hard disk recovery wizard to recover all your permanently deleted data from the damaged hard drive. You can also try the demo version and get familiar with the efficiency of the software.
How Can I Partition My Hard Drive Without Formatting Windows 10?
The Best method to partition hard drive without being formatting any Window is using the Disk Management Tool. This is the inbuilt utility offered by Microsoft to make divisions in the hard disk drive. Instead of using the third party tool, go for the Disk Management Software as it is perfectly capable of completing the partitioning process.
Note: The steps mentioned in the blog is specific to Windows 10 but can be efficiently used in Windows 8.1, 8, 7 and other below versions.
Now, check the steps to partition hard drive without formatting Windows 10
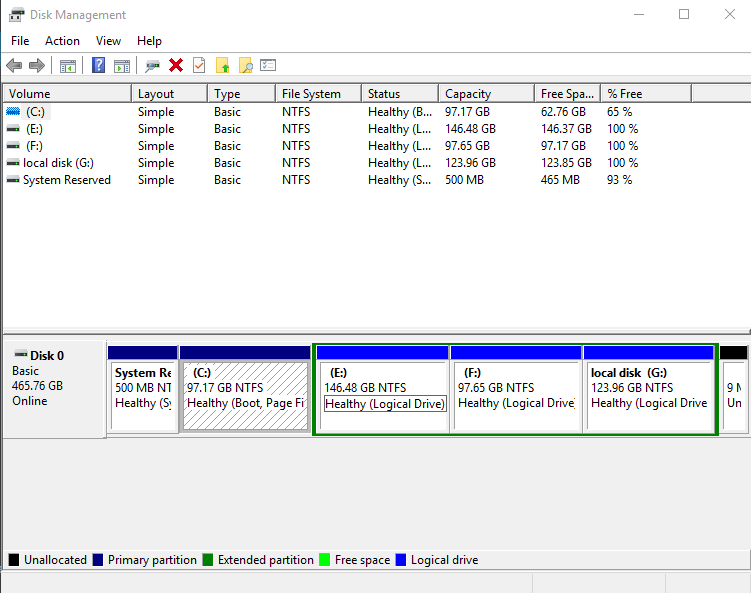
Step 1: Go to the Windows search box and type Disk Management in the search bar. An option will appear “Create and format hard disk partition”. Click on that option. A new window will appear like this.

Or
Alternatively
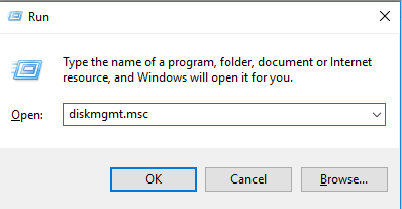
Hit the “Win + R” keys and type “diskmgmt.msc” and enter “OK”

Or
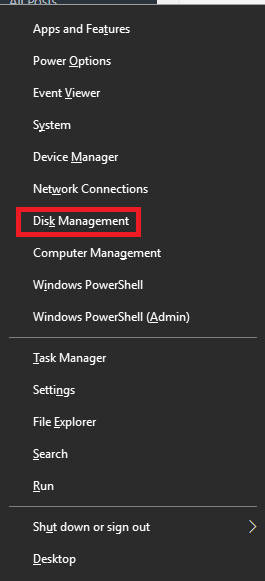
Press “Win + X” buttons and select “Disk Management” from the drop-down list.

Step 2: Now, choose the hard drive from the available list in which you want to create the partition.
If your drive exists one loaded with files and folders, still you need to create some “unallocated space”. Otherwise, no partition will be created before you. Right click on the desired drive and select the “shrink volume” option from the drop-down.
Step 3: Now, the internal structure of the PC will calculate the free space which can be allocated to the new partition. After calculating, it will ask you how much free space you want to use for your new drive. If you want to use all space, just click on the “Shrink button” otherwise specify the size and input it into megabytes before hitting Shrink.
Depending on your disk size, the amount of time taken can vary. After its completion, there will be new “unallocated” space which can be seen in the corresponding physical drive in Disk Management screen.
Step 4: If you are using a new hard disk, just skip this space. Otherwise, right-click the “unallocated” space and choose New Simple Volume
Step 5: Go to the on-screen manual instructions and choose the size of the volume to be used and the drive letter. (By default it will use all unallocated space)
Step 6: It is advised to format new and old drives when creating a new division. If you are given that option, go for that. For “File System”, go for NTFS type
“exFAT” is mainly used for portable devices like Pen Drive.
Step 7: Now, one after another window will appear. Ruthlessly click on the “Next” button and finally hit “Finish” to create the partition. Now, the hard drive will have a very new partition with its own name. In the Disk Management Page, check all your information about it.

