How to Perform Office 365 Tenant to Tenant Migration? Follow Step by Step Guide

Performing the data migration in O365 can become a complex project if you don’t know the right approach to do this job. Before moving towards the migration process you have to select the right solution. Remember, Microsoft doesn’t provide any direct solution to perform Office 365 tenant to tenant migration, as a result, it becomes more complicated.
Therefore, in this article, we will describe a method to simplify complications for the same. Let’s start from the beginning…
This type of migration needs vary according to the organization’s scenarios, but mainly organizations need to perform data transfer operations at the time of mergers and acquisitions or rebranding and divestiture.
Migrating the user’s mailbox data from one tenant to another in Office 365 involves several technical & complex steps, but the main two phases are most important namely Tenant preparation and Data Migration. We have to carefully perform both steps to achieve successful a data transfer.
Also Read: How to Migrate Office 365 to Google Suite?
Phase 1: Prepare Source & Destination for Migrating from One O365 Tenant to Another
Tenant preparation has an important role in process of Office 365 migration; it will make the entire migration smooth & fast for you. Following steps are involved in the tenant preparation phase –
1: Domain Preparation:
In the domain migration process, one thing that is most important that is the domain can be attached to only one Tenant at a time. So before detaching the domain from the source tenant, we have to migrate data from domain to destination tenant, then detach the domain after that attach the domain in the destination Office 365 tenant. Follow the steps for Domain preparation:
- Start the domain verification process on the target tenant from the email domain.
- In the target tenant admin center, add a domain, and create text records in DNS (Domain Name System) for verification.
2: Schedule Office 365 Tenant to Tenant Migration:
In this step, we have to segregate users which we need to migrate source to destination tenant. To do this we will create a CSV file in which maintain the source & destination user’s email ID.
This CSV file will create a mapping between source & destination tenant users. Moreover, it will help us to perform tenant to tenant migration in Office 365 without a data mismatch issue.
3: Disable Directory Sync in Source Tenant before Migrating from One O365 Tenant to Another:
Disable active directory sync from the source tenant admin center. Once Active Directory Sync is disabled from the source tenant, any changes to the source tenant AD DS will no longer sync to Office 365.
This process will take 24 hours to complete, so you have to do this step before 24 hours of the tenant to tenant migration.
After preparation, we have to move on to the next steps in which we will migrate Office 365 tenant to tenant.
Phase 2: Automated Tool to Perform Office 365 Tenant to Tenant Migration
The unavailability of any direct method has created the need to use an automated migration tool. So we will use a trusted automated Office 365 to Office 365 migration tool. This is an error-free, reliable and quick solution to perform this operation.
Some of the Smart Features That Makes It One Stop Solution
This tool provides many advanced features that help you to perform Office 365 tenant to tenant migration safely. The following are advantages of this tool –
- Migrate Emails, Contacts, Calendars, Documents from source tenant to destination Office 365 tenant.
- Move Office 365 domain user’s mailboxes from One tenant to another Office 365 tenant.
- Support all Office 365 subscriptions & migrate their data to another tenant.
- Date-based filter to migrate a specific amount of data based on a date range.
- Provides facility to perform selective users or entire Office 365 tenant user’s migration.
- Delta migration facility to move newly arrived data from source tenant to destination tenant.
- Account-based priority option for migration to set the priority of account which you need to migrate first.
- Import CSV facility to create a mapping between source & destination users.
- Option to move selective mailbox items (email, contact, calendar, document).
Also Read: How To Migrate Outlook Mailbox To Office 365?
Software Steps to Execute Microsoft 365 (Office 365) Tenant to Tenant Migration are:
Let’s explore the steps of the tool to accomplish the transition. Follow the given steps to successfully perform the migration:
Step 1. Install, run the software, and select Office 365 as a source and as a destination.
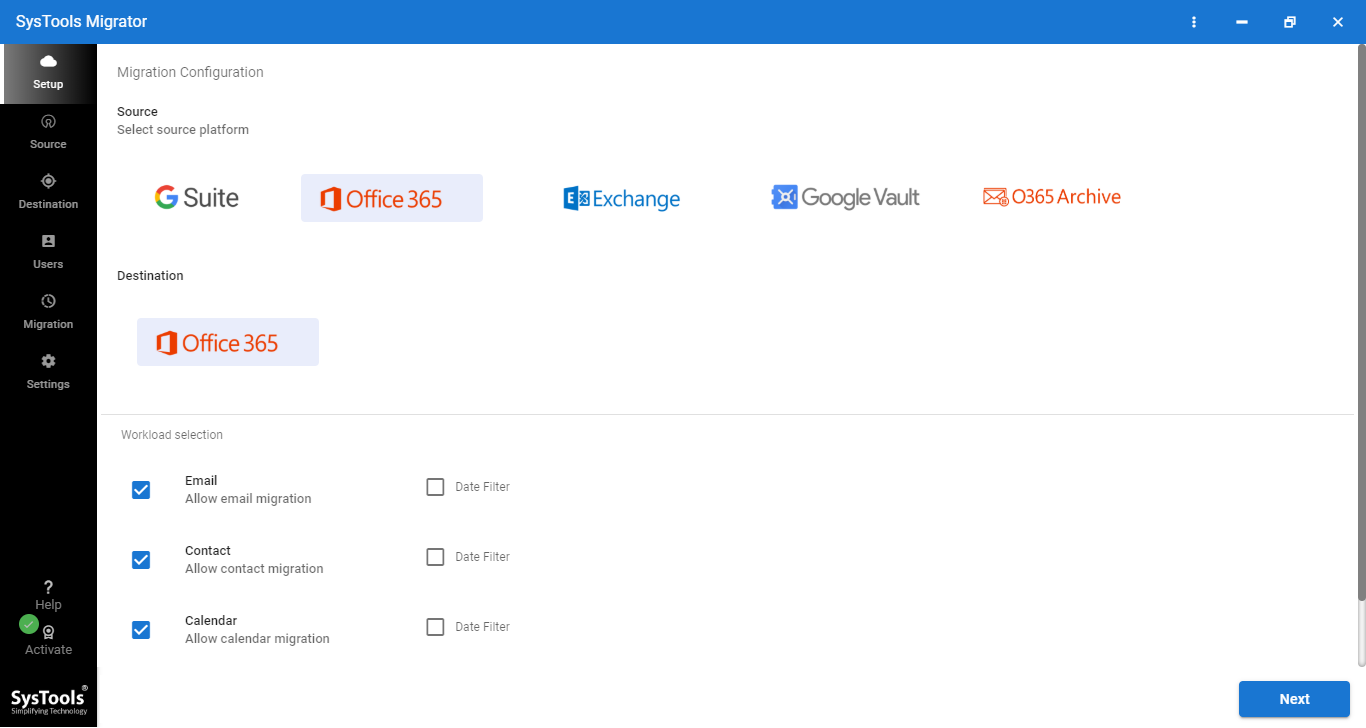
Step 2. Then select items (email, contact, calendar, and document) which you want to migrate.
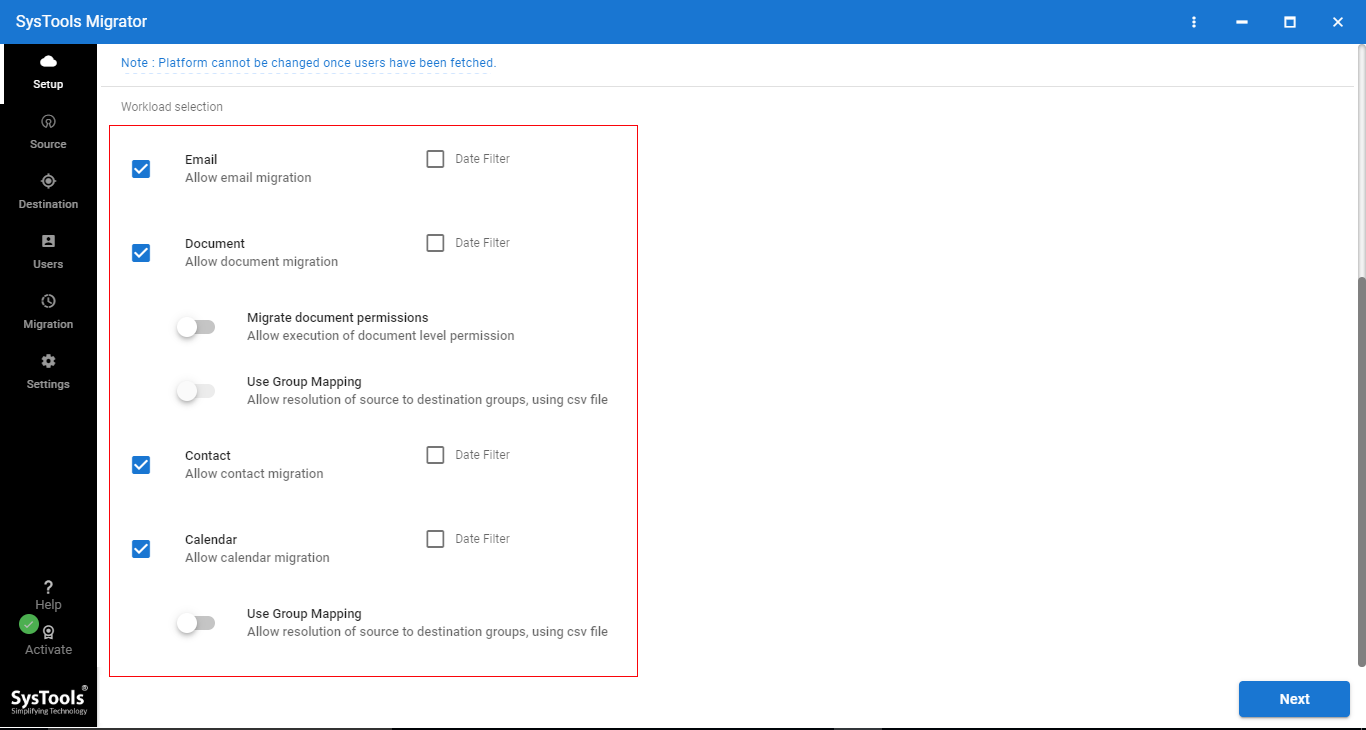
Step 3. On the same screen (Workload Station) you can see the tool provides a Date-based filter, Migrate document permission, Use Group Mapping. Apply options according to need, then click on Next to perform Office 365 tenant to tenant migration safely.

Step 4. Now enter the source Office 365 admin email ID & application ID then click on the Validate button to validate permissions..
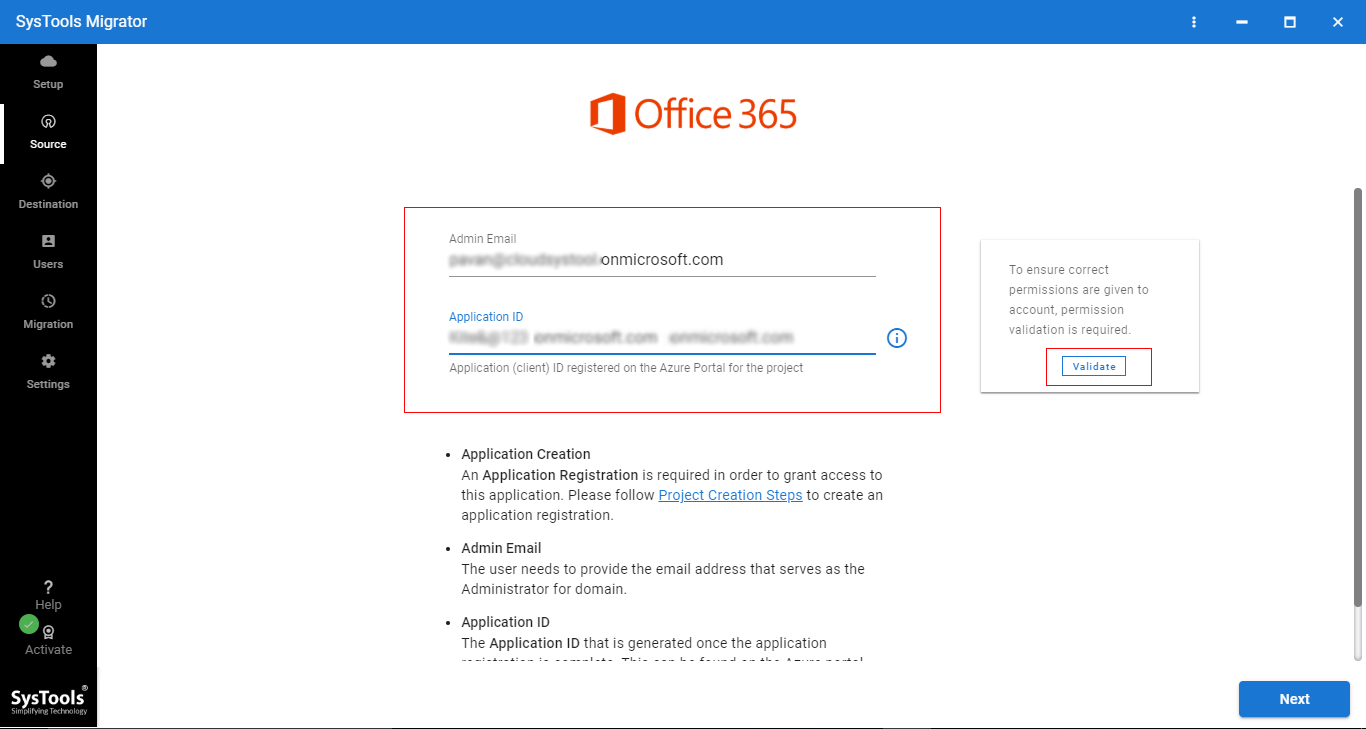
Step 5. After validating permissions, click on Next.

Step 6. Now, enter destination admin email ID & application ID. Click on Next to migrate data between Office 365 tenants.
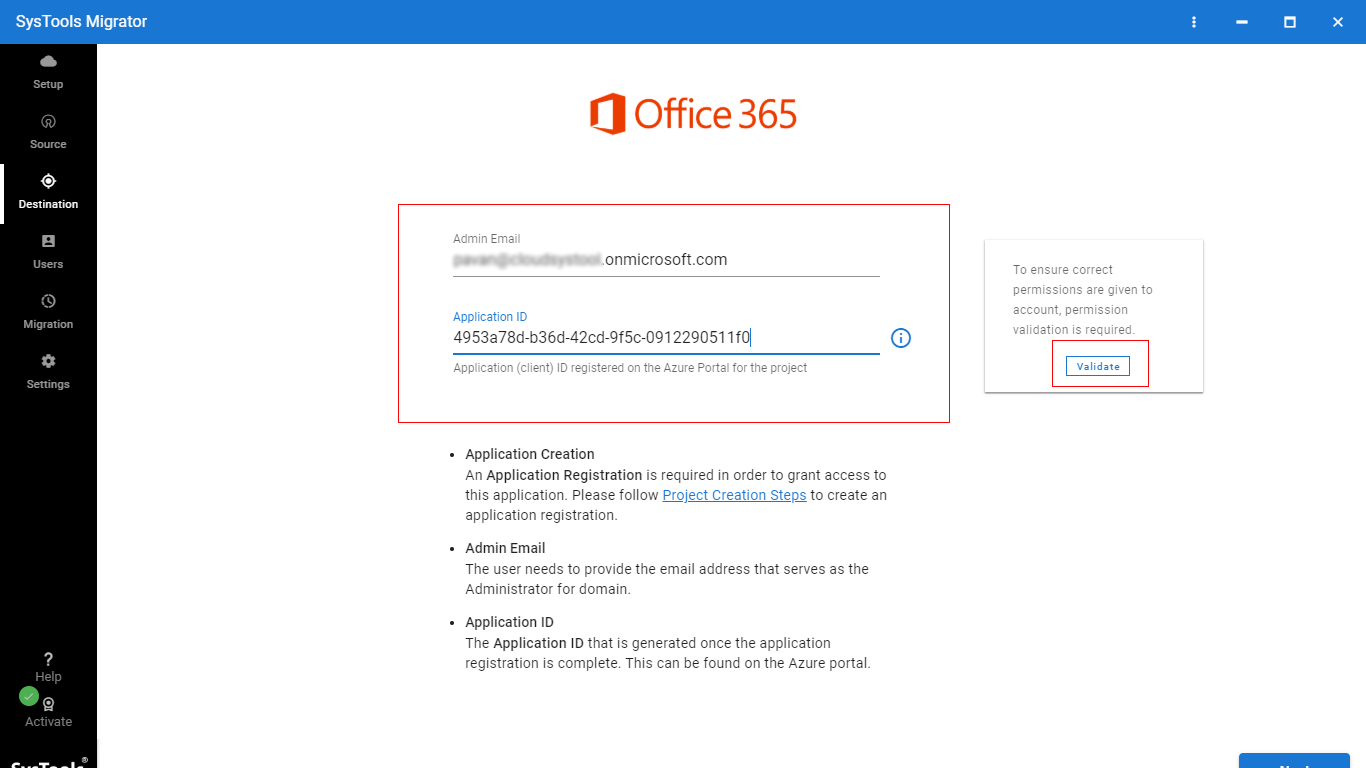
Step 7. Once permissions are validated by software click on Next.

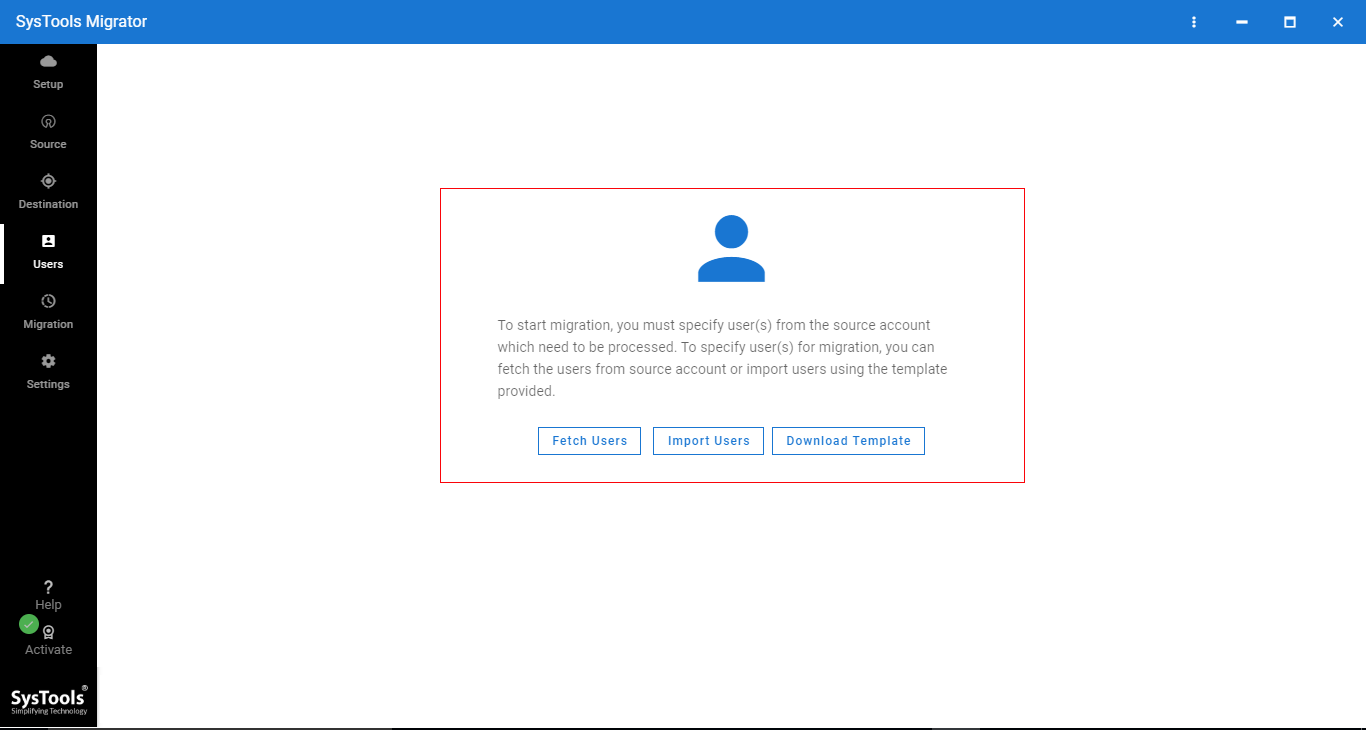
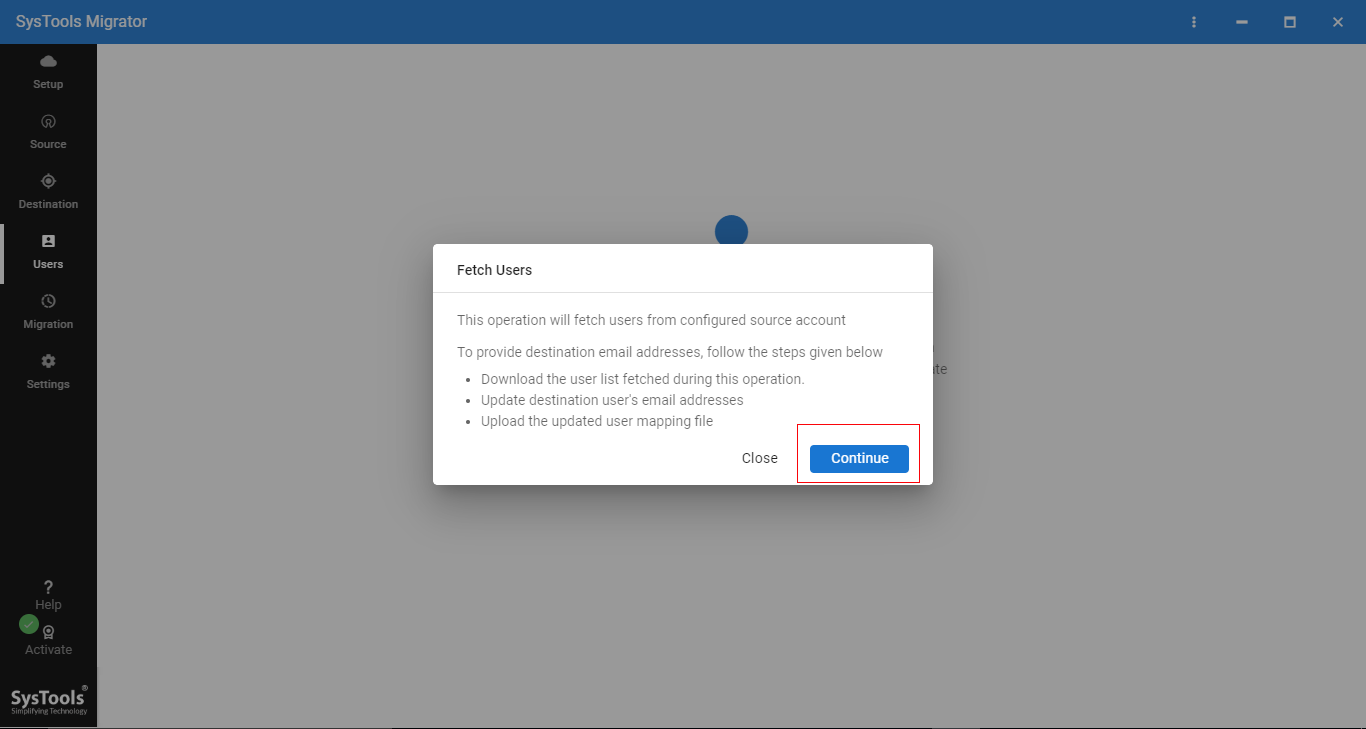
Step 8. Now, we have to create a mapping between source & destination users. To do job software provides three options – 1- Fetch users, 2 – Import users, 3 – Download template. Select any one option and click on Next.
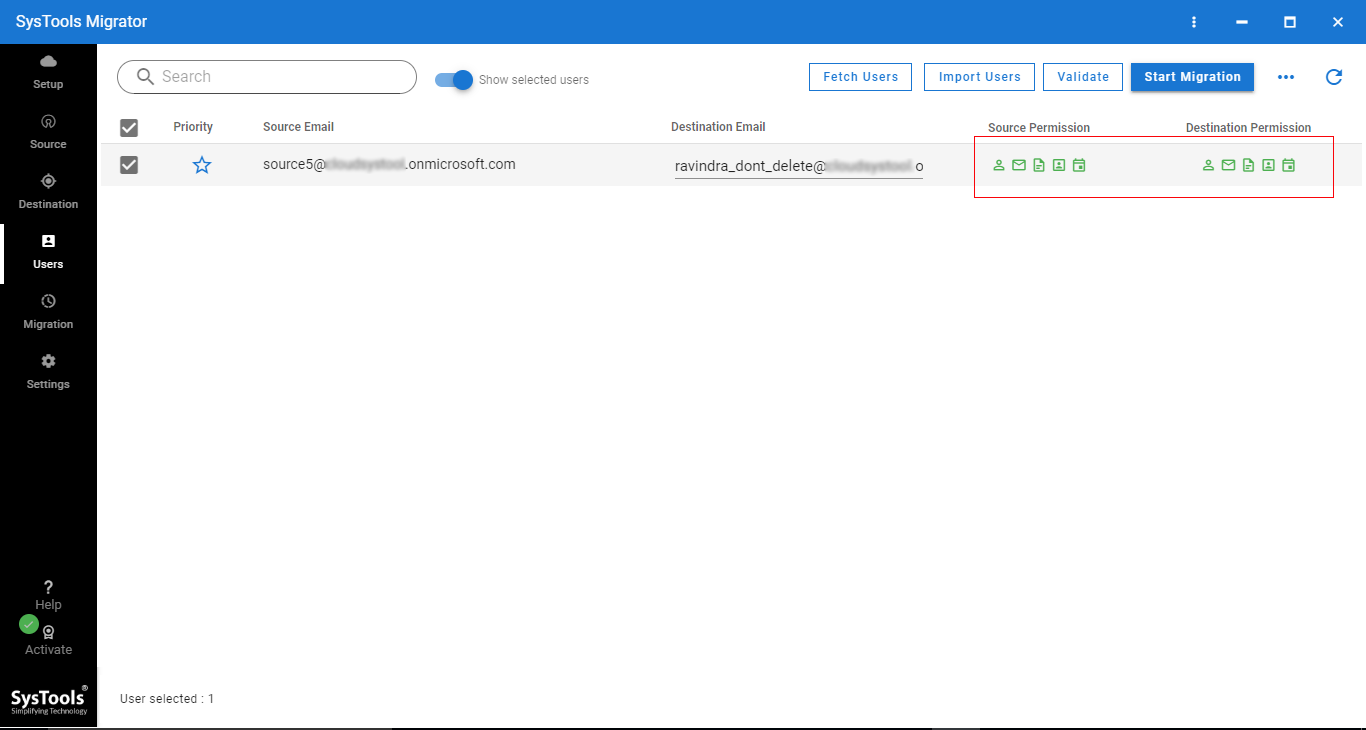
Step 9. You can see mapping is successfully created between source & destination Office 365 users. Now click on Validate button.
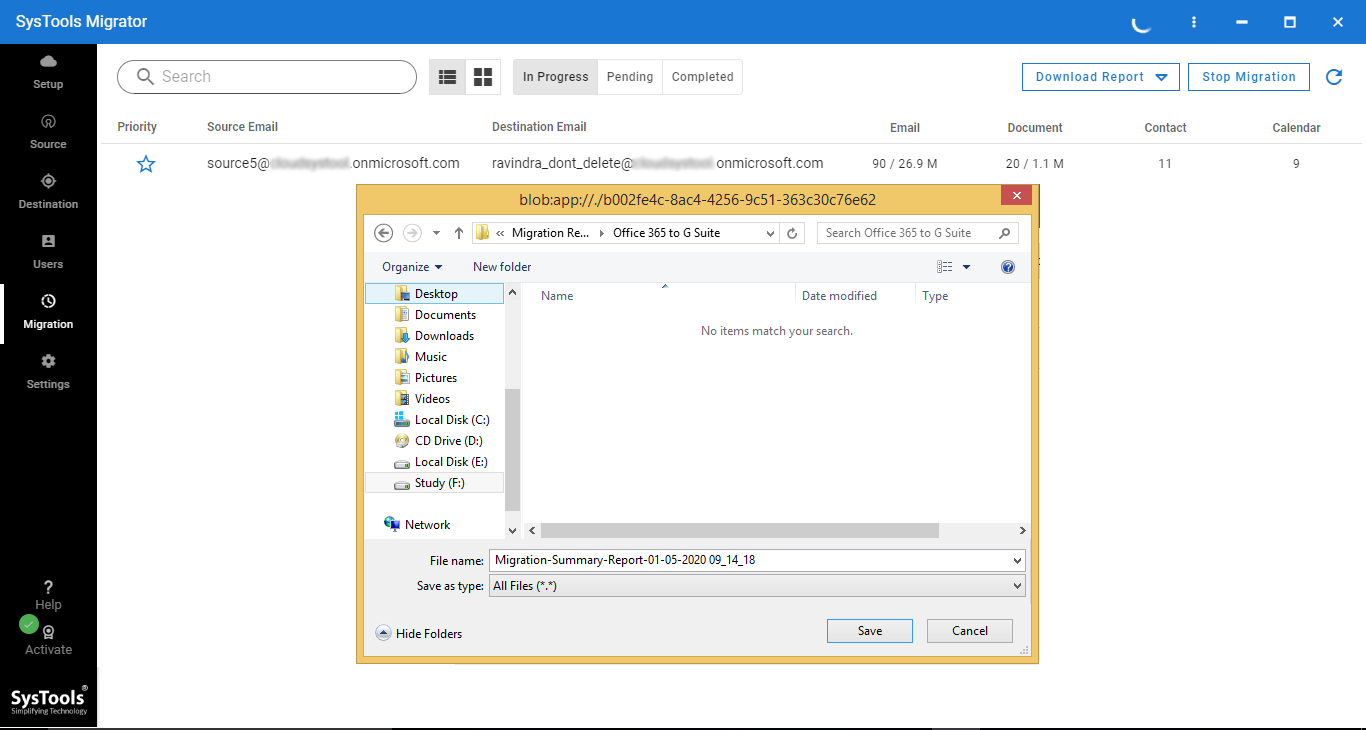
Step 10. Lastly, click on the Start button to start Office 365 tenant to tenant migration process.
Step 11. After migration, you can save the migration report.
User Review
At first, I was reluctant to use the automated tool. But when I got to your product page, I tried the demo version. Using the free version, I purchased the tool because it was full-filling all my requirements. Thanks for this product! I am looking forward to having many more efficient and reliable products! Moreover, i will recommed this software to everyone who is trying to migrate Microsoft 365 tenants.
Final Verdict
This article provided a fast and reliable solution for Office 365 tenant to tenant migration step-by-step. We recommend that you should use automated software to perform this complex operation, however, users with prior technical knowledge can use a manual solution.
Novice users can easily perform this operation with maximum data protection and integrity throughout the process with the help of the above-mentioned tool, in the least amount of time possible.