Steps to Repair SQL Server
Step 1
Download and install the tool >> Now Click on the Open button and Browse Database file
Step 2
Select at least one scanning option from the given options and select Auto Detect Database File.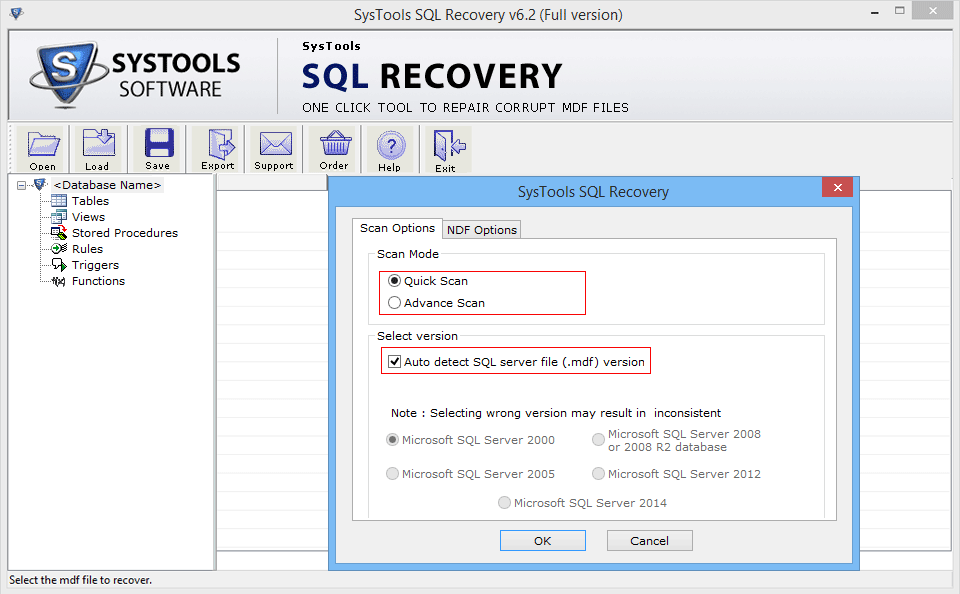
Step 3
Choose the Second radio button if you want to select NDF file manually otherwise select the first one for Autodetection and click OK.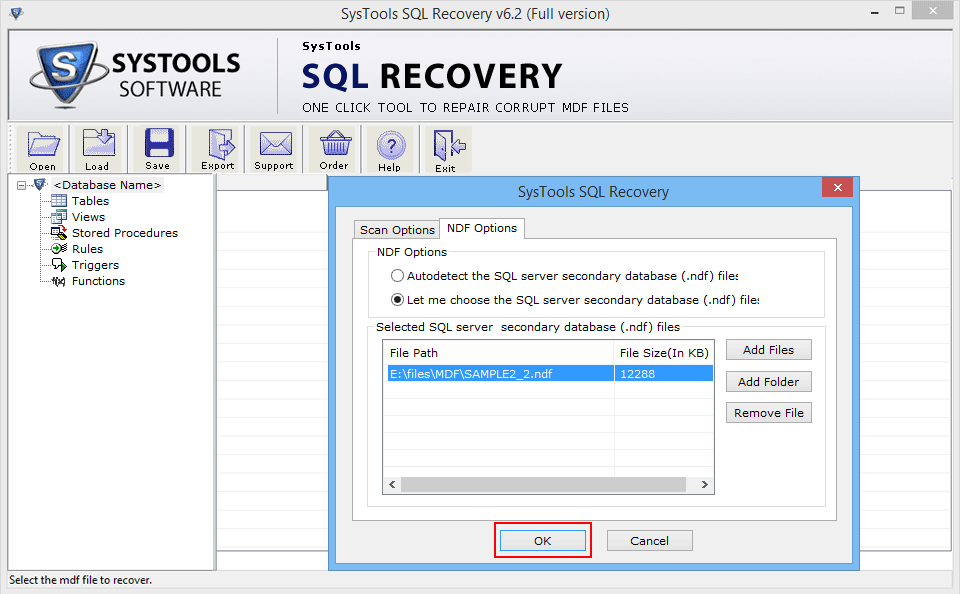
Step 4
The tool starts scanning selected database files and show the recovered attributes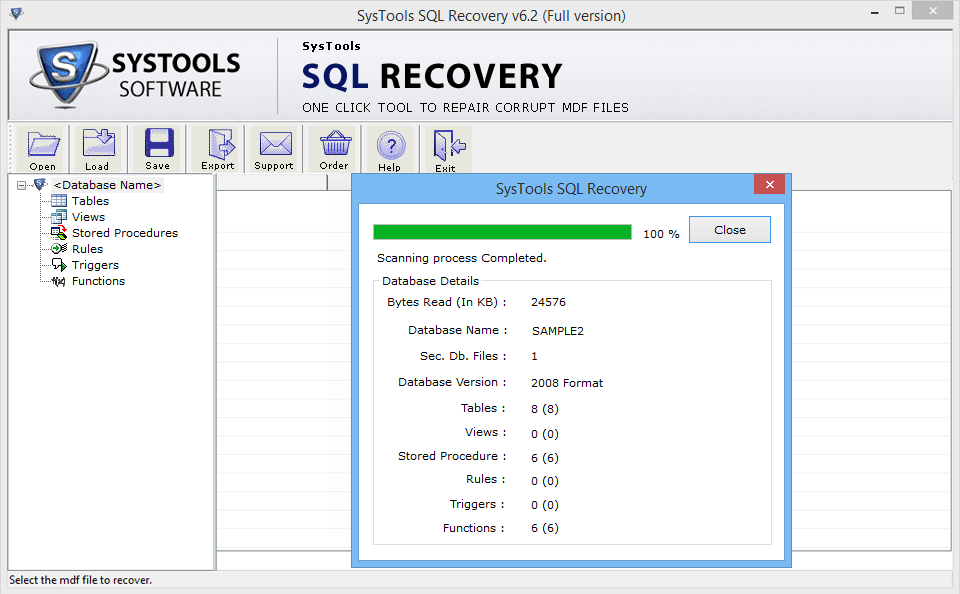
Step 5
The tool will show a confirmation message "save the scanned file" >> Click YES button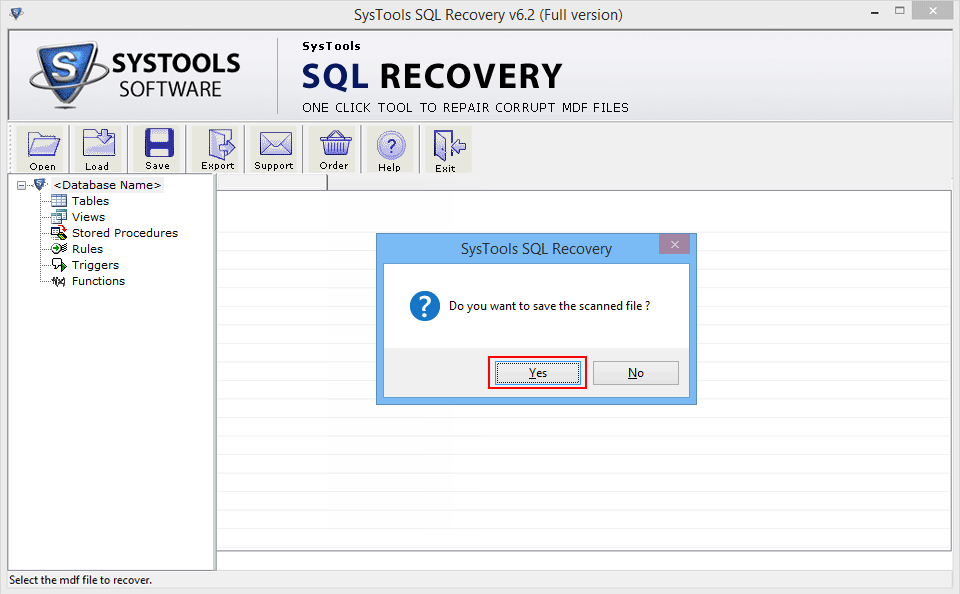
Step 6
Now click on the Export button to export the recovered database and Fill in the mandatory fields and then click on 'Save' to end the procedure of Database recovery.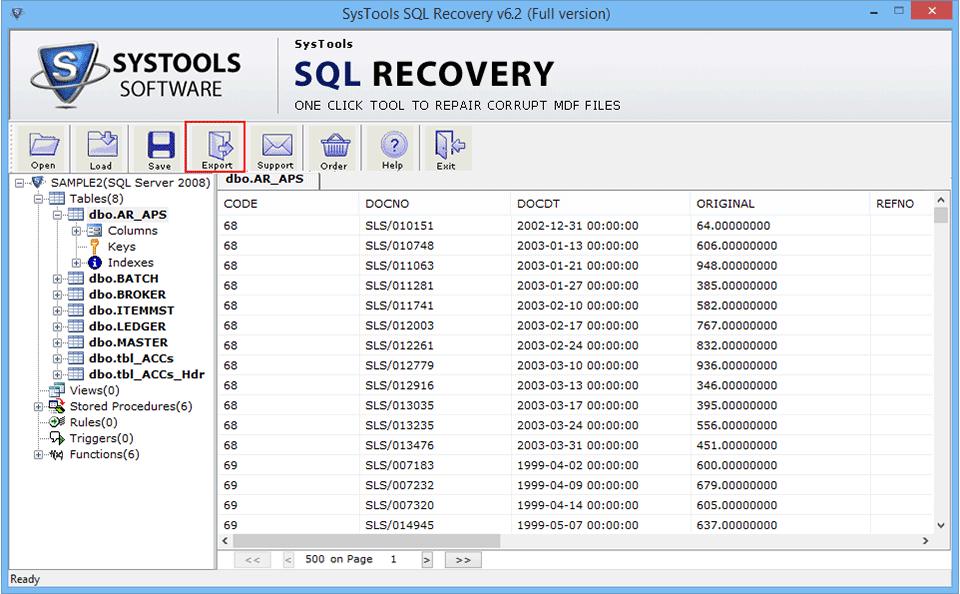
Step 7
No need to provide a User Name & Password if you are using Windows Server Authentication. 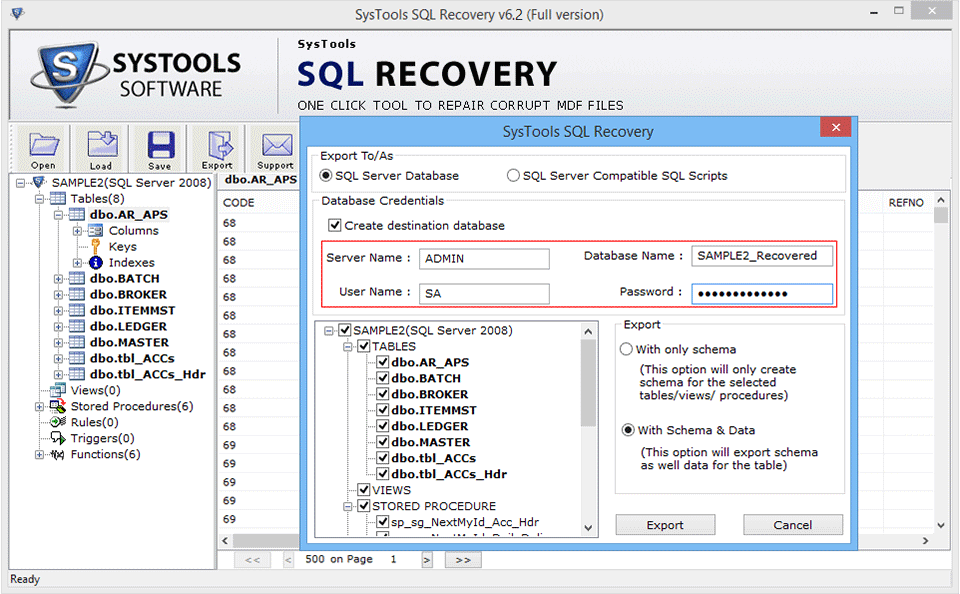
Step 8
In the Prompt asking about Export Deleted Record as Wellclick on YES if you agree otherwise select NO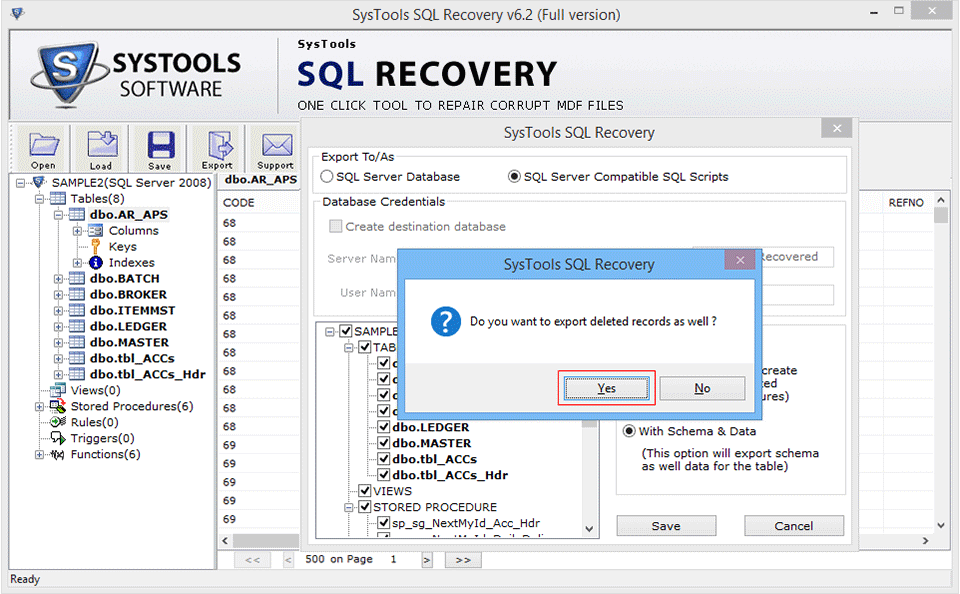
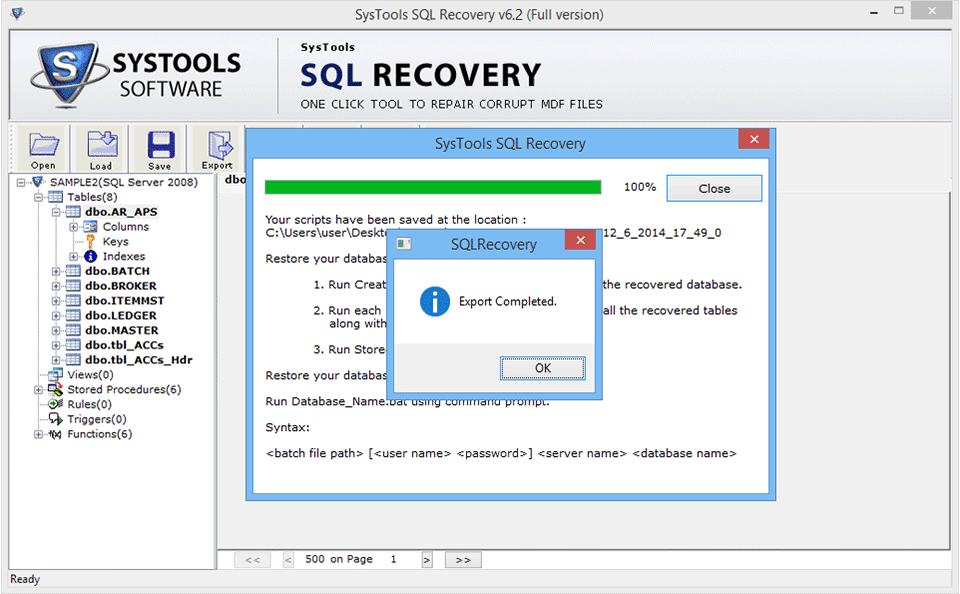
Step 9
It will take a few minutes and show confirmation message "Export Completed" >> Click the OK button